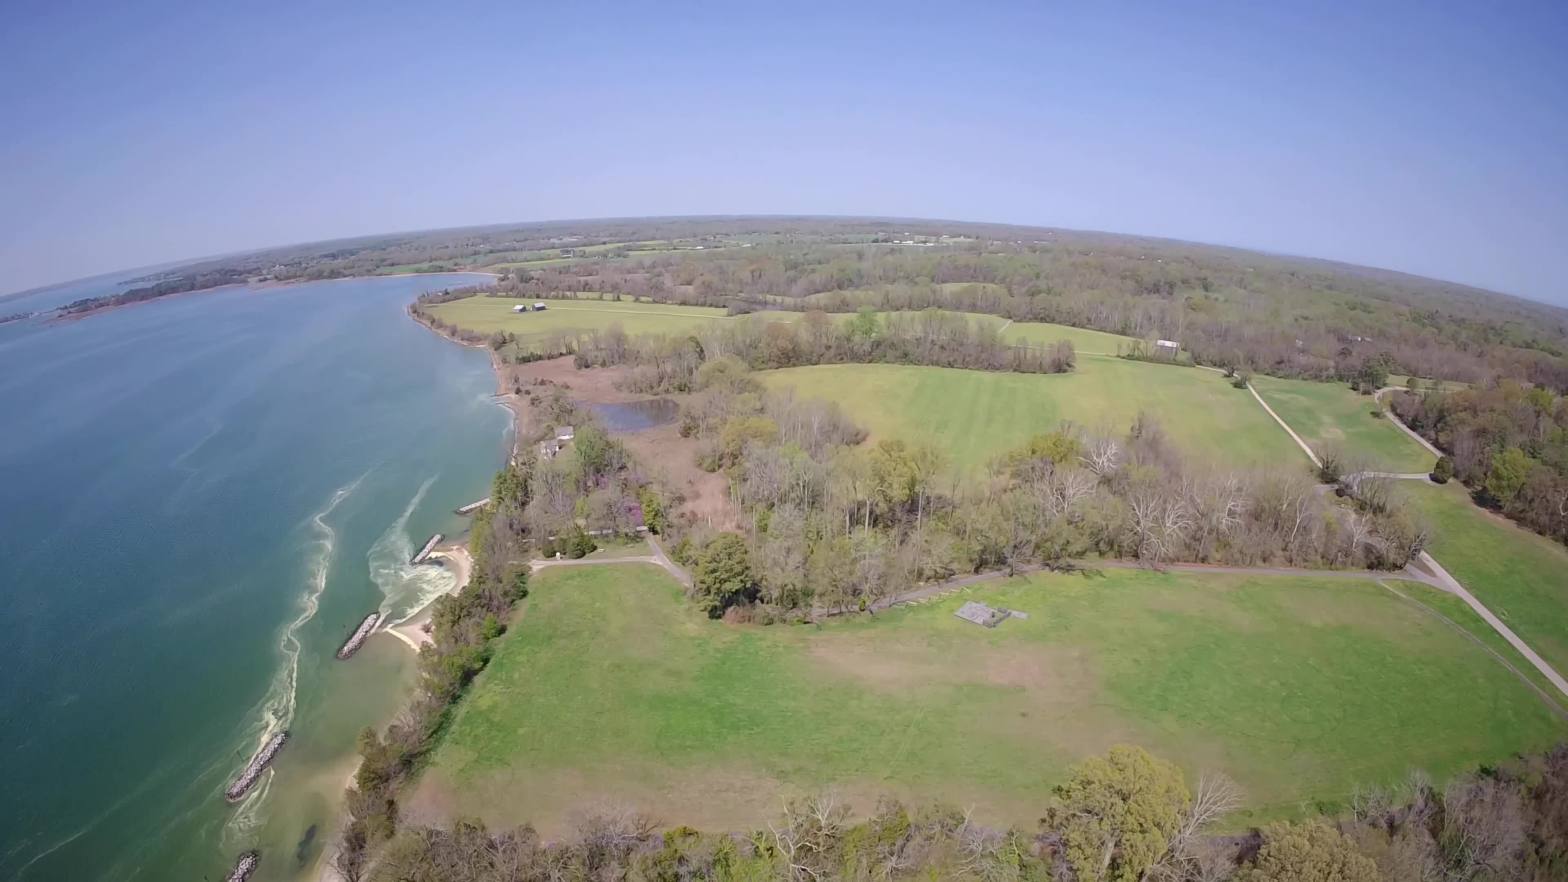
April 4th, 2026 was a beautiful spring day in Southern Maryland with perfect wind for flying a kite. I took my Rokkaku out to Jefferson Patterson Park in Calvert County and captured this GoPro video. I hope you enjoy watching it almost as much as I enjoyed making it!
Persistence Pays Off

This week I had some rare time to myself during the middle of the day. I haven’t had too many chances for KAP this year, as followers of this blog may have noticed, but this day seemed promising. That morning there was plenty of wind when I dropped my kids off at school, and with the fall colors having reached their peak and now just beginning to fade, it seemed like it might be my one chance to capture them from my kite this year. I charged various batteries and got everything set to go. I made a quick decision to head to Myrtle Point Park, which I’d KAP’ed at only one time before and had pretty good results. The wind direction was right for it, but not for the few other places I have on my mental list.
Unfortunately, by the time I was ready to leave, the wind situation seemed much less promising, and I questioned whether I should try to fly at all, but I decided that I might as well take the chance. I arrived at the park 15 minutes later and then spent about 10 more minutes hiking to the beach. The wind still didn’t seem promising. Nevertheless, I set up my Rokker kite and gave it a few attempts. The good thing was that, since it was November, hardly anyone else was at the beach, leaving almost the whole area for me to walk into the little wind to try to coax the kite into the air. For a while, most of my attempts resulted in the kite getting one or two hundred feet up and then coming back down when the wind died, with no chance of attaching the KAP rig to the line. Finally, though, I got some steadier wind and actually managed to attach the rig and let out some more line…before the wind decided to die once again. The rig made a soft landing in the sand, and I hurried over to grab the line ahead of it so I could keep bringing the kite down. At this point, I was pretty sure KAP wasn’t in the cards for today. Just when I had given up, though, the wind picked up once again. Due to the landing, the kite line was kind of tangled around the picavet lines of the KAP rig, but thankfully I was able to untangle it quickly and get it back into the air.
This time, the wind remained steady for about 15 minutes, giving me just enough time to release most of my line and snap some pictures. Since I had been here before, I knew that the view towards the bridge was the best, so I didn’t bother trying to take any others. There ended up not being enough time anyway, because the wind died once again, forcing me to end the session. The rig landed in the sand a second time, this time tangling the two lines hopelessly together. I didn’t mind, since I was happy to beat my own expectations and get a very nice kite aerial photo of Southern Maryland in fall colors and soft November light. I have had plenty of unsuccessful KAP sessions, but this time persistence paid off!

Success on the Second Attempt at Annapolis Bay Bridge
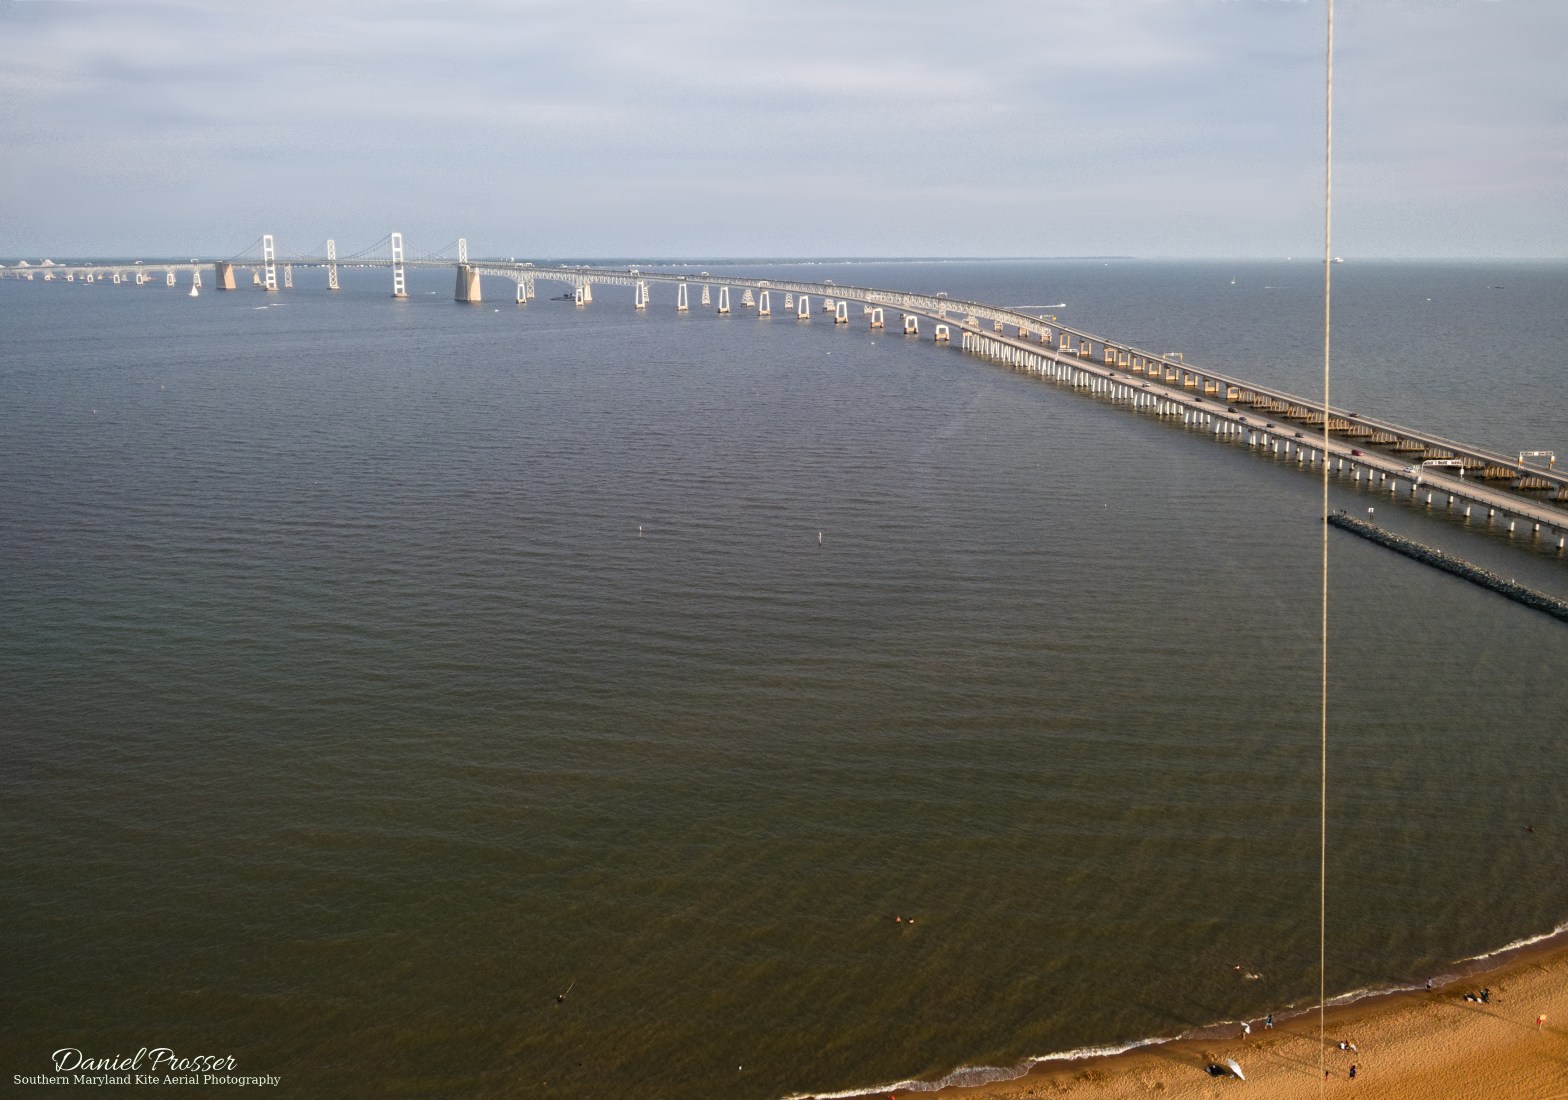
Most of my kite aerial photography has been near where I live in Southern Maryland. An hour and a half away is Annapolis, the capital of Maryland, which is the site of a large bridge crossing the Chesapeake Bay. There is also a public park (called Sandy Point State Park) with a large beach close to the bridge, which I thought would be an ideal location for KAP. So, one afternoon when I had the time, I made the trip to Annapolis for some KAP. Actually, I did this twice, but the first time I forgot to turn on my KAP camera and ended up with zero pictures! That was disappointing, but let’s forget about that, okay?
The second time out I made sure everything was turned on and functioning before sending the camera away. The wind was a steady 12 mph (perfect for my Rokker), making flying the kite a breeze (pardon the pun). The only problem was that the sun was behind a cloud. This lasted for a long time, and I actually took a bunch of pictures and started bringing the kite down before it finally peeked out and bathed the area in golden light, since it was now golden hour. I got some pictures that I’m happy with, though the bridge wasn’t quite as scenic as I was hoping. It was worth making the trip for these pictures, but I probably won’t go back a third time! At least, not just for KAP.


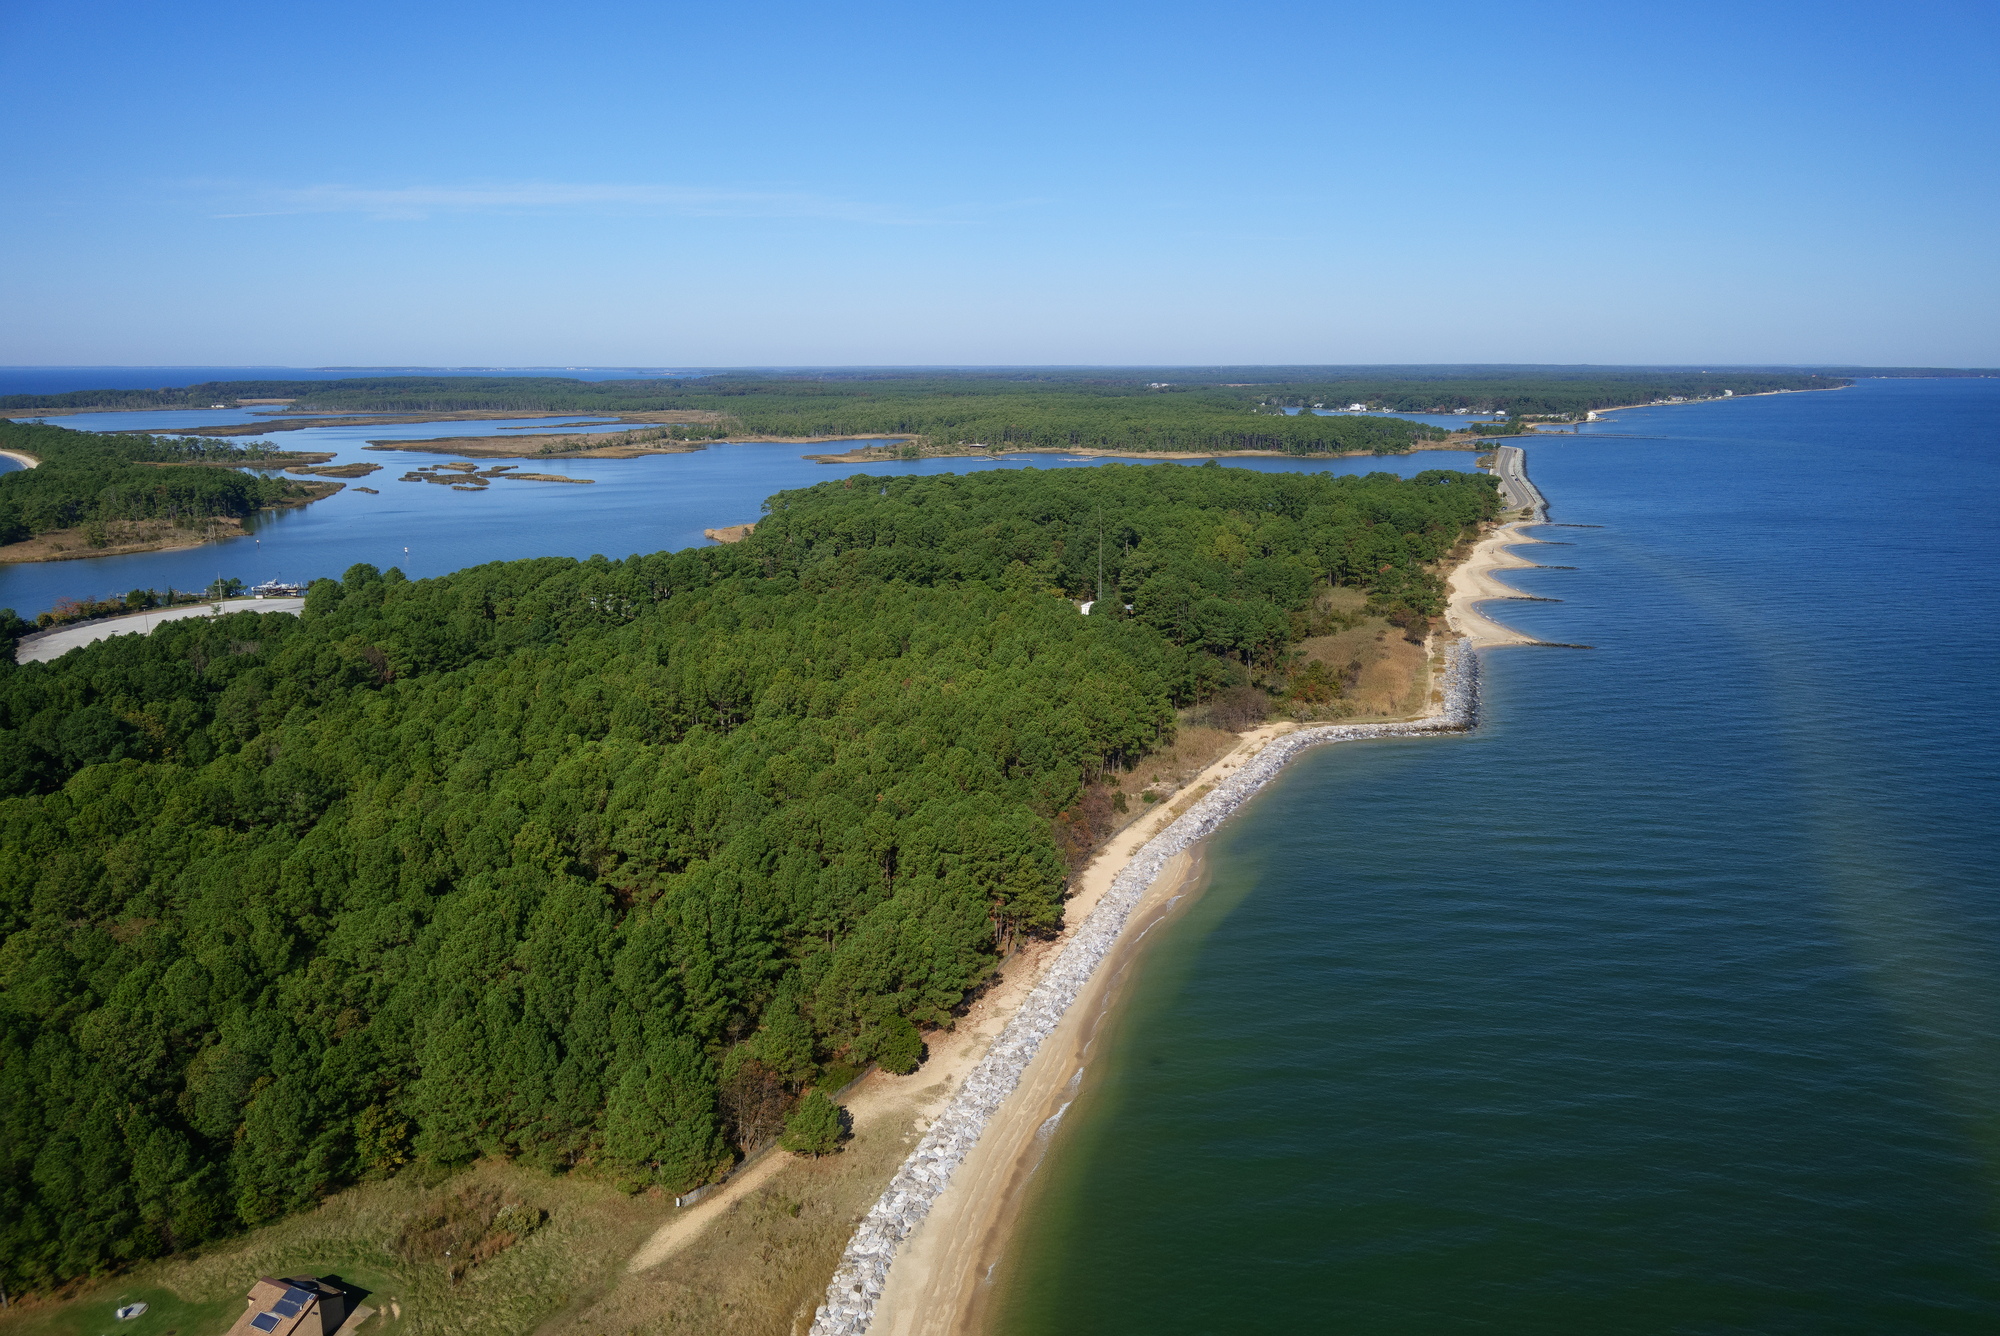
Calvert Cliffs in Morning Light
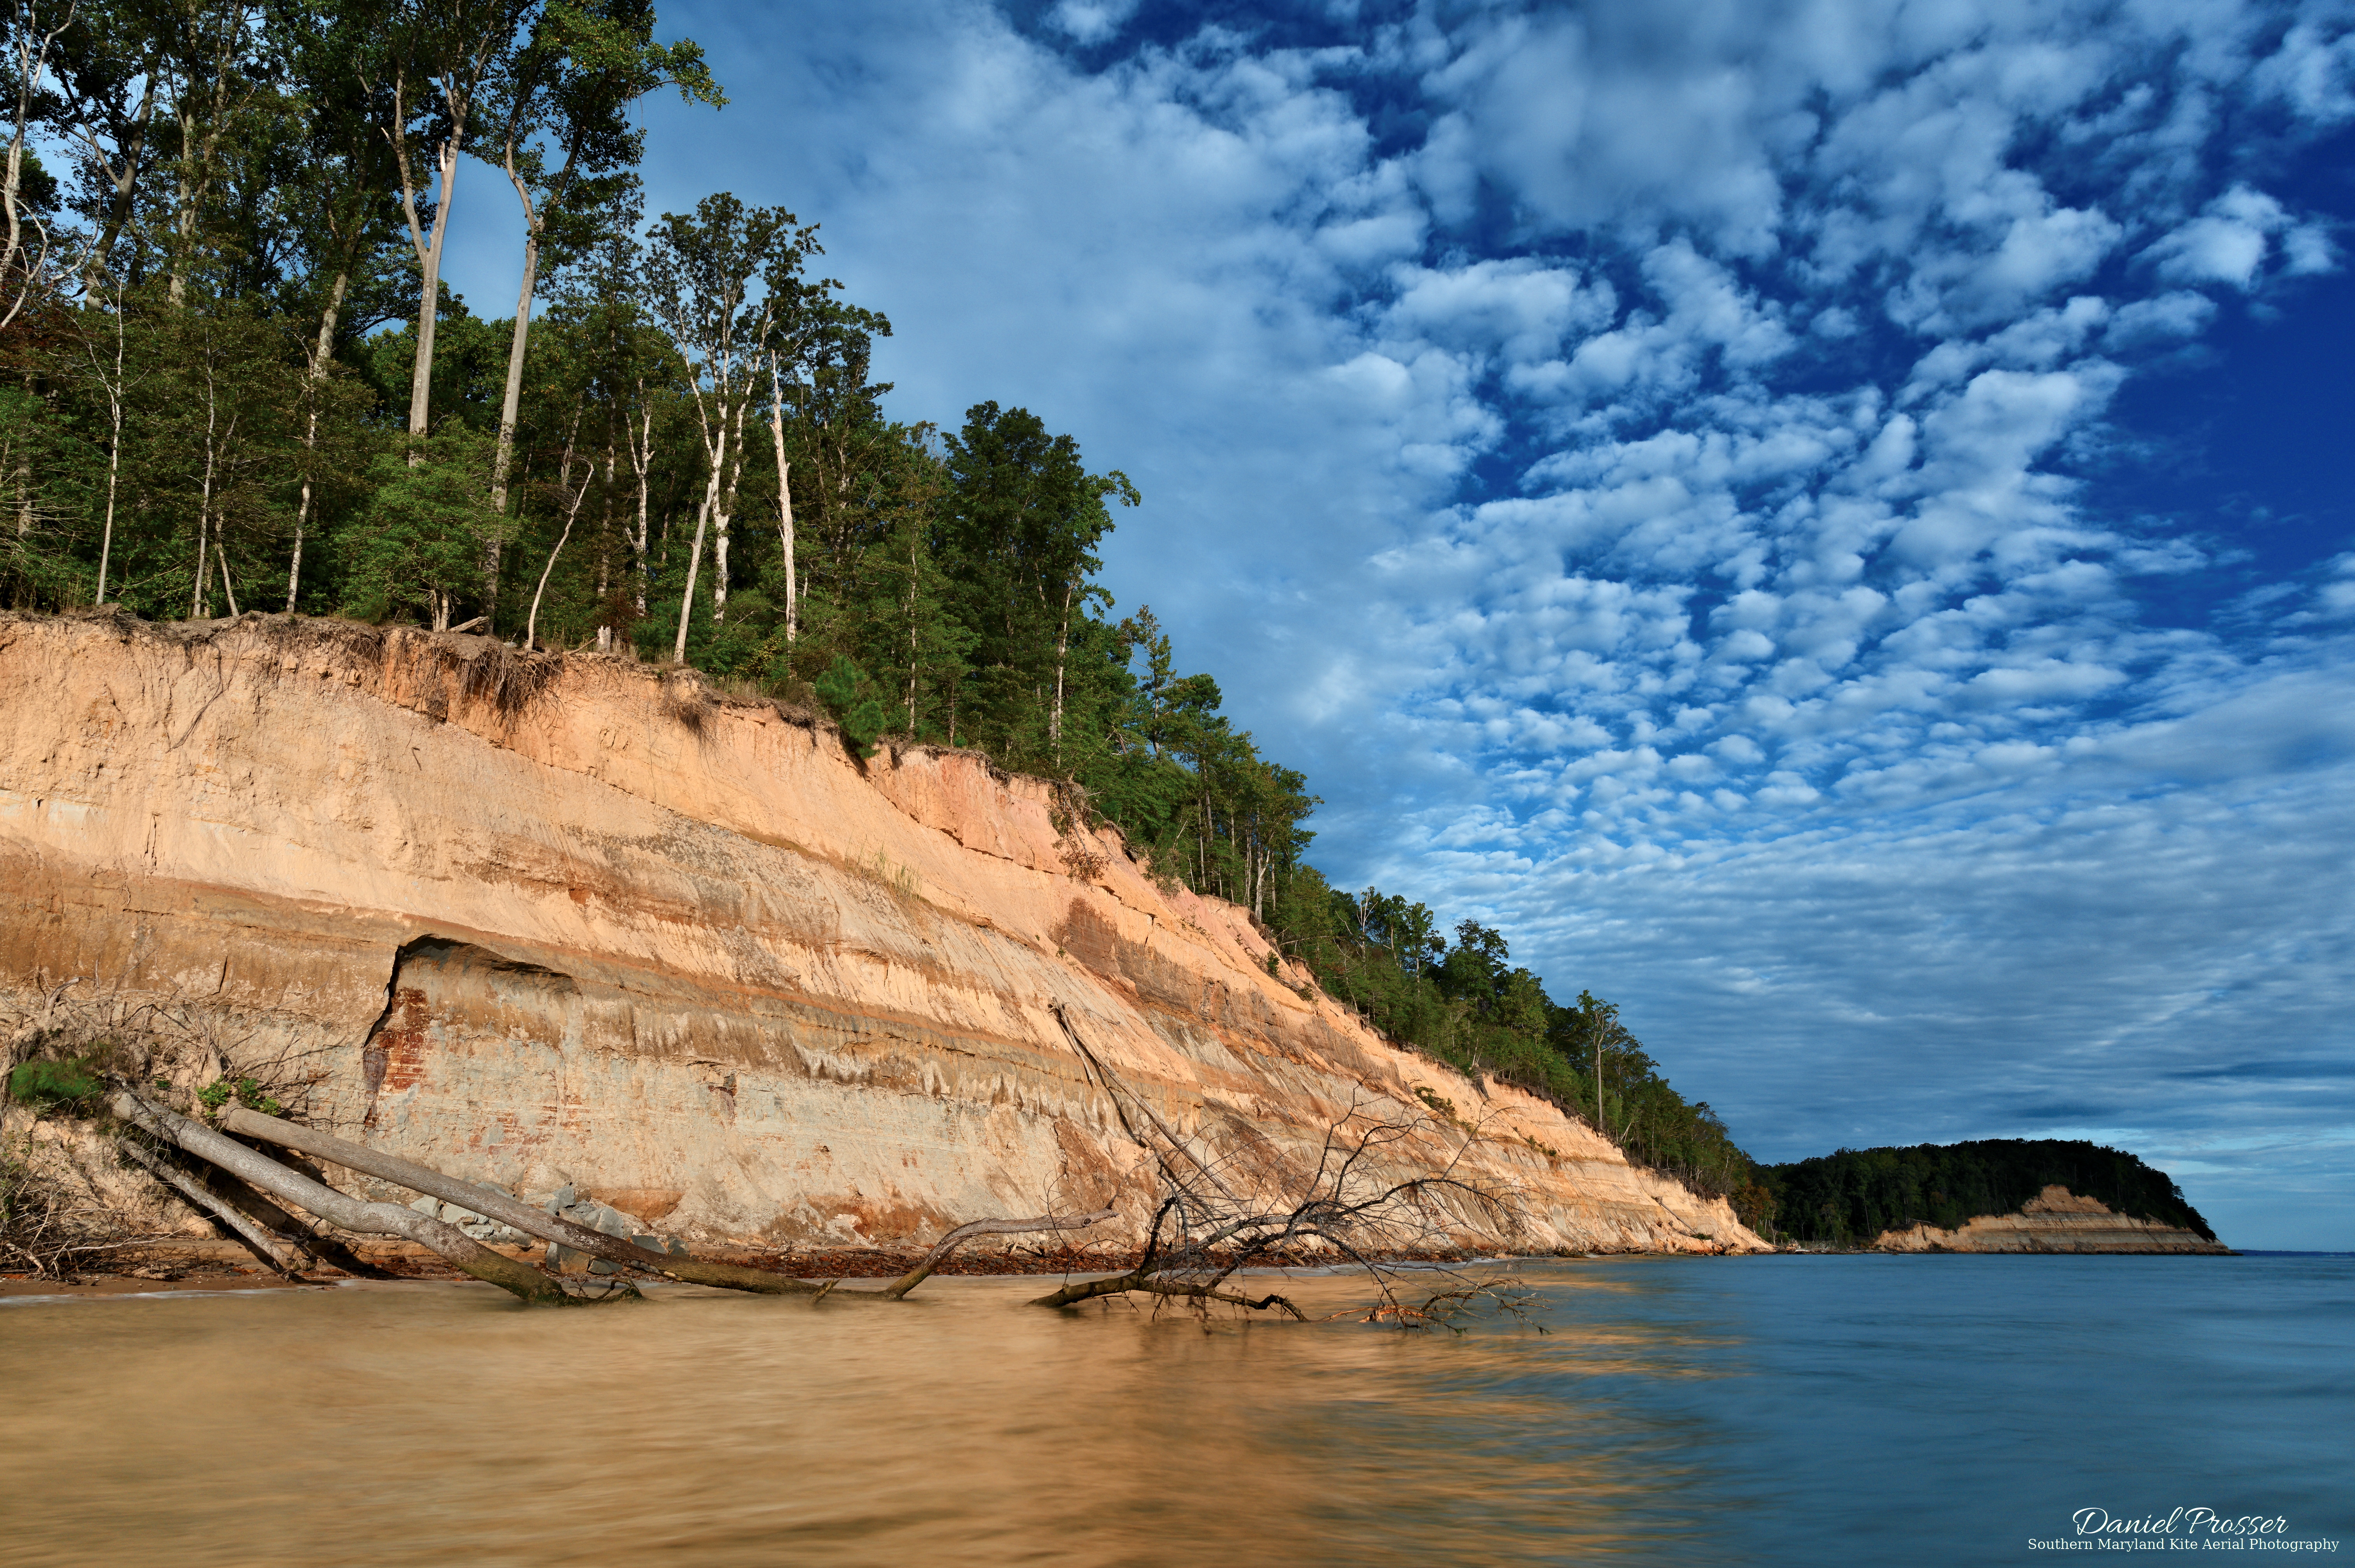
For only my second KAP session of the year, I got just the right conditions to head back to Calvert Cliffs. (The first KAP session unfortunately ended with no pictures because I forgot to turn on the camera before launching it into the sky — woops!) Calvert Cliffs is a really beautiful place in Southern Maryland that I’ve photographed with my kite before and also from the ground (actually in the water) with a regularly-operated camera. Here is that picture, by the way:
Flying a kite here can be challenging, though, because the wind direction has to be just right to come down the creek valley and lift the kite out over the water, and also because the beach is pretty narrow. Everything was looking just right according the forecast, so I got up early and arrived at the park at 7:00 am, soon after it opened, since I was also hoping to get some soft morning light. The two-mile hike to the beach paid off, because the wind was just as the forecast had said. This was one of those times where my Rokker kite got up and away on the first try with no difficulty at all.
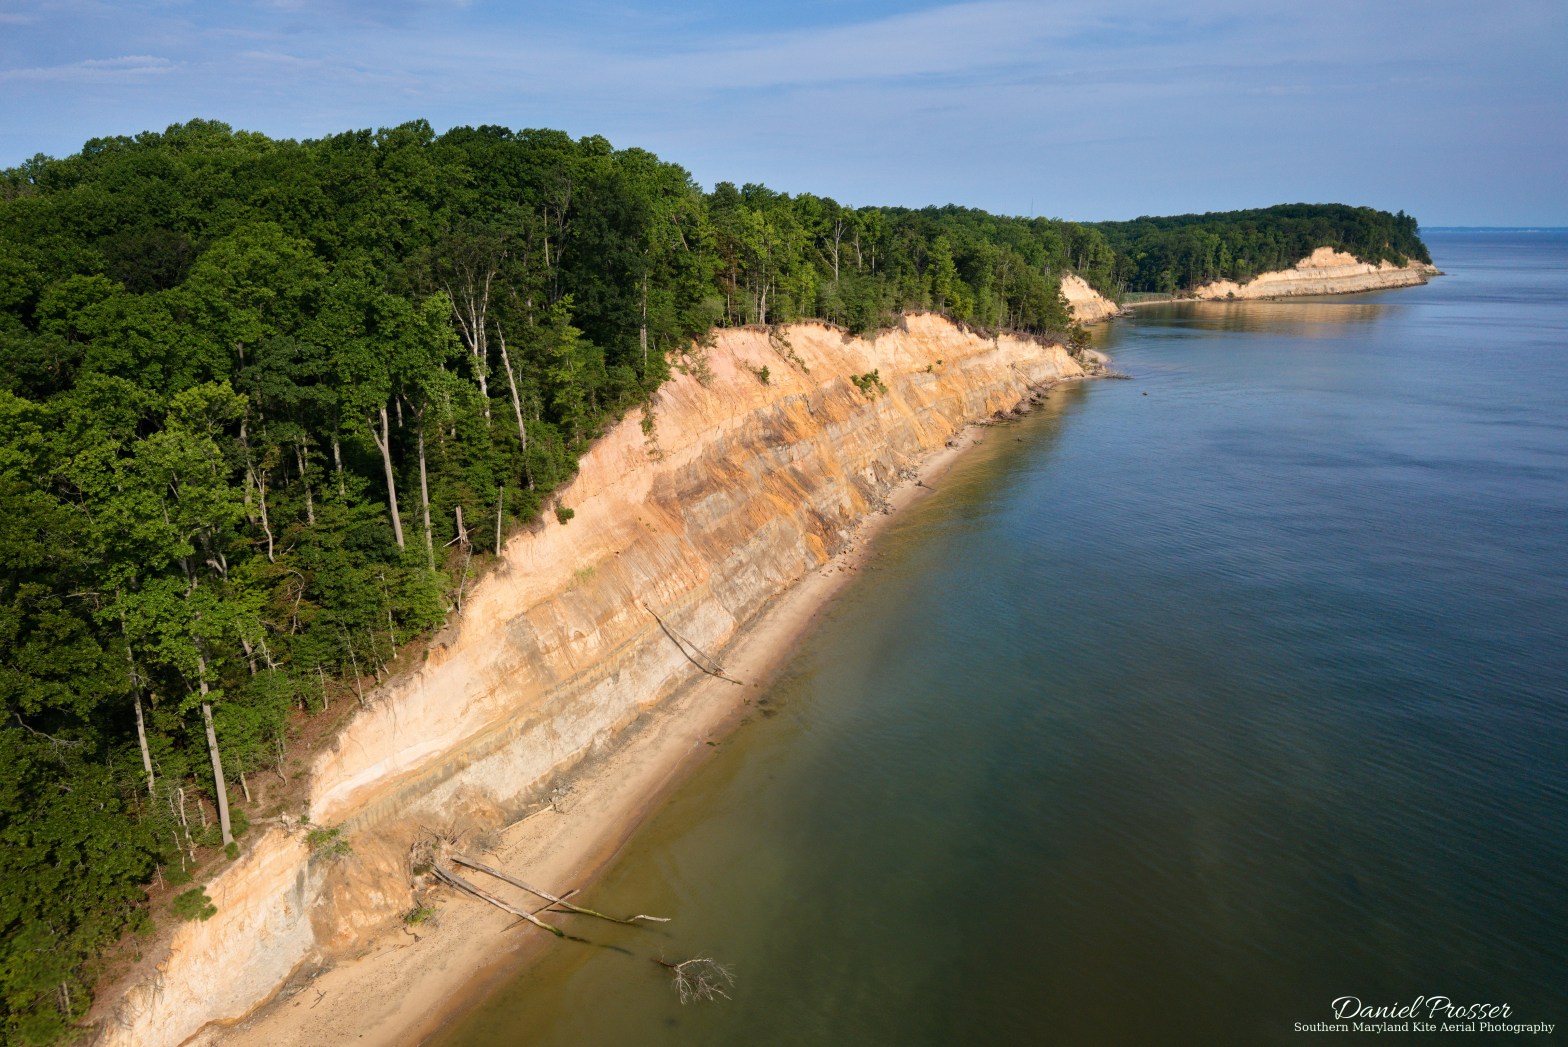
Despite the perfect wind, the cloud cover was not quite perfect. Though the sky was only partly cloudy, there seemed to be a never-ending row of clouds marching directly in front of the sun. I flew on one side of the beach for probably about thirty minutes taking aerial photos from different heights but never quite getting out of the shade from the clouds. At that point, I decided I might as well walk to the other side of the beach and at least get some other pictures. Finally, the sun peaked out from the clouds, and I got a picture looking down on the cliffs and trees from above. You can also see me and the kite string if you look carefully. During the time when clouds were blocking the sun, I also turned the camera in the other direction and got a picture of the offshore oil rig (which looks a lot closer in real life than it appears with this wide-angle lens).

Now that there were finally some moments of sunlight, I hurried back to the other side of the beach and managed to capture the shot I was looking for: the north-end cliffs basked in golden morning light. The lighting definitely came out better than in my previous session at Calvert Cliffs, where the main issue was a completely overcast sky.

With steady winds, there were no surprises bringing the camera and kite back down, though it was hard work at times, as it tends to be with a big kite. This was a fun and successful KAP session.
So what do you think? Which is your favorite aerial photo of Calvert Cliffs? And do you prefer the aerial photo over the one above taken from the water? Feel free to leave a comment if you feel like sharing your opinion!
St. Mary’s Lake in Fall

It’s been a long time since I’ve posted, but I have a KAP story from last fall that I have neglected to write until now. It was my last KAP session of 2022, and the last successful one I’ve had in general (although I did have one this year that would have been successful if I had just remembered to turn on the camera – doh!), so it’s past time to share it. I happened to catch the fall colors right at their peak, and the peak was pretty colorful last fall, by Southern Maryland standards anyway.
For the location, I chose St. Mary’s River State Park – a place I’ve KAPed at a couple times before. It seemed like a good choice because it boasts many deciduous trees. The main goal was to get the kite nice and high and capture as much of the color show as possible. The walk over to the flying site was quite beautiful; there were a lot of bright yellow trees along that part of the path. I stopped to fly along a clearing on the east end of the lake.

The wind was around 10-15 mph as I recall, just right for the Rokker. It took a couple attempts to get the kite up in the air, and then I had to bring it down to make a bridle adjustment. Without too much trouble, though, the KAP rig was soon up and away. It was partly cloudy for most of the flight, but there was still some blue sky and enough light for some nice pictures. My favorites were the high-altitude panorama at the top of the page, displayed again below, and another one facing towards the north. The panorama was made up of three separate images. It is interesting to me how the colors vary at different parts of the lake. There are more golden and orange leaves on the south end (that I walked past during the hike), and more evergreens and reds at the north end.

I also made a quick vlog from this flight so you can take in more of the scenery and see some video of the kite flying. I hope I get a chance to get back to KAPing again soon in 2023!
Point Lookout Fishing Pier
This past weekend I headed back to Point Lookout for some more KAP. The main mission was to get another picture to put on my wall. I’ve recently printed out several of my favorite landscape photographs, including two KAP shots, and hung them, but, as you can see, I have an open spot for one more (the large one is 12×18″ and the smaller ones are 8×12″).
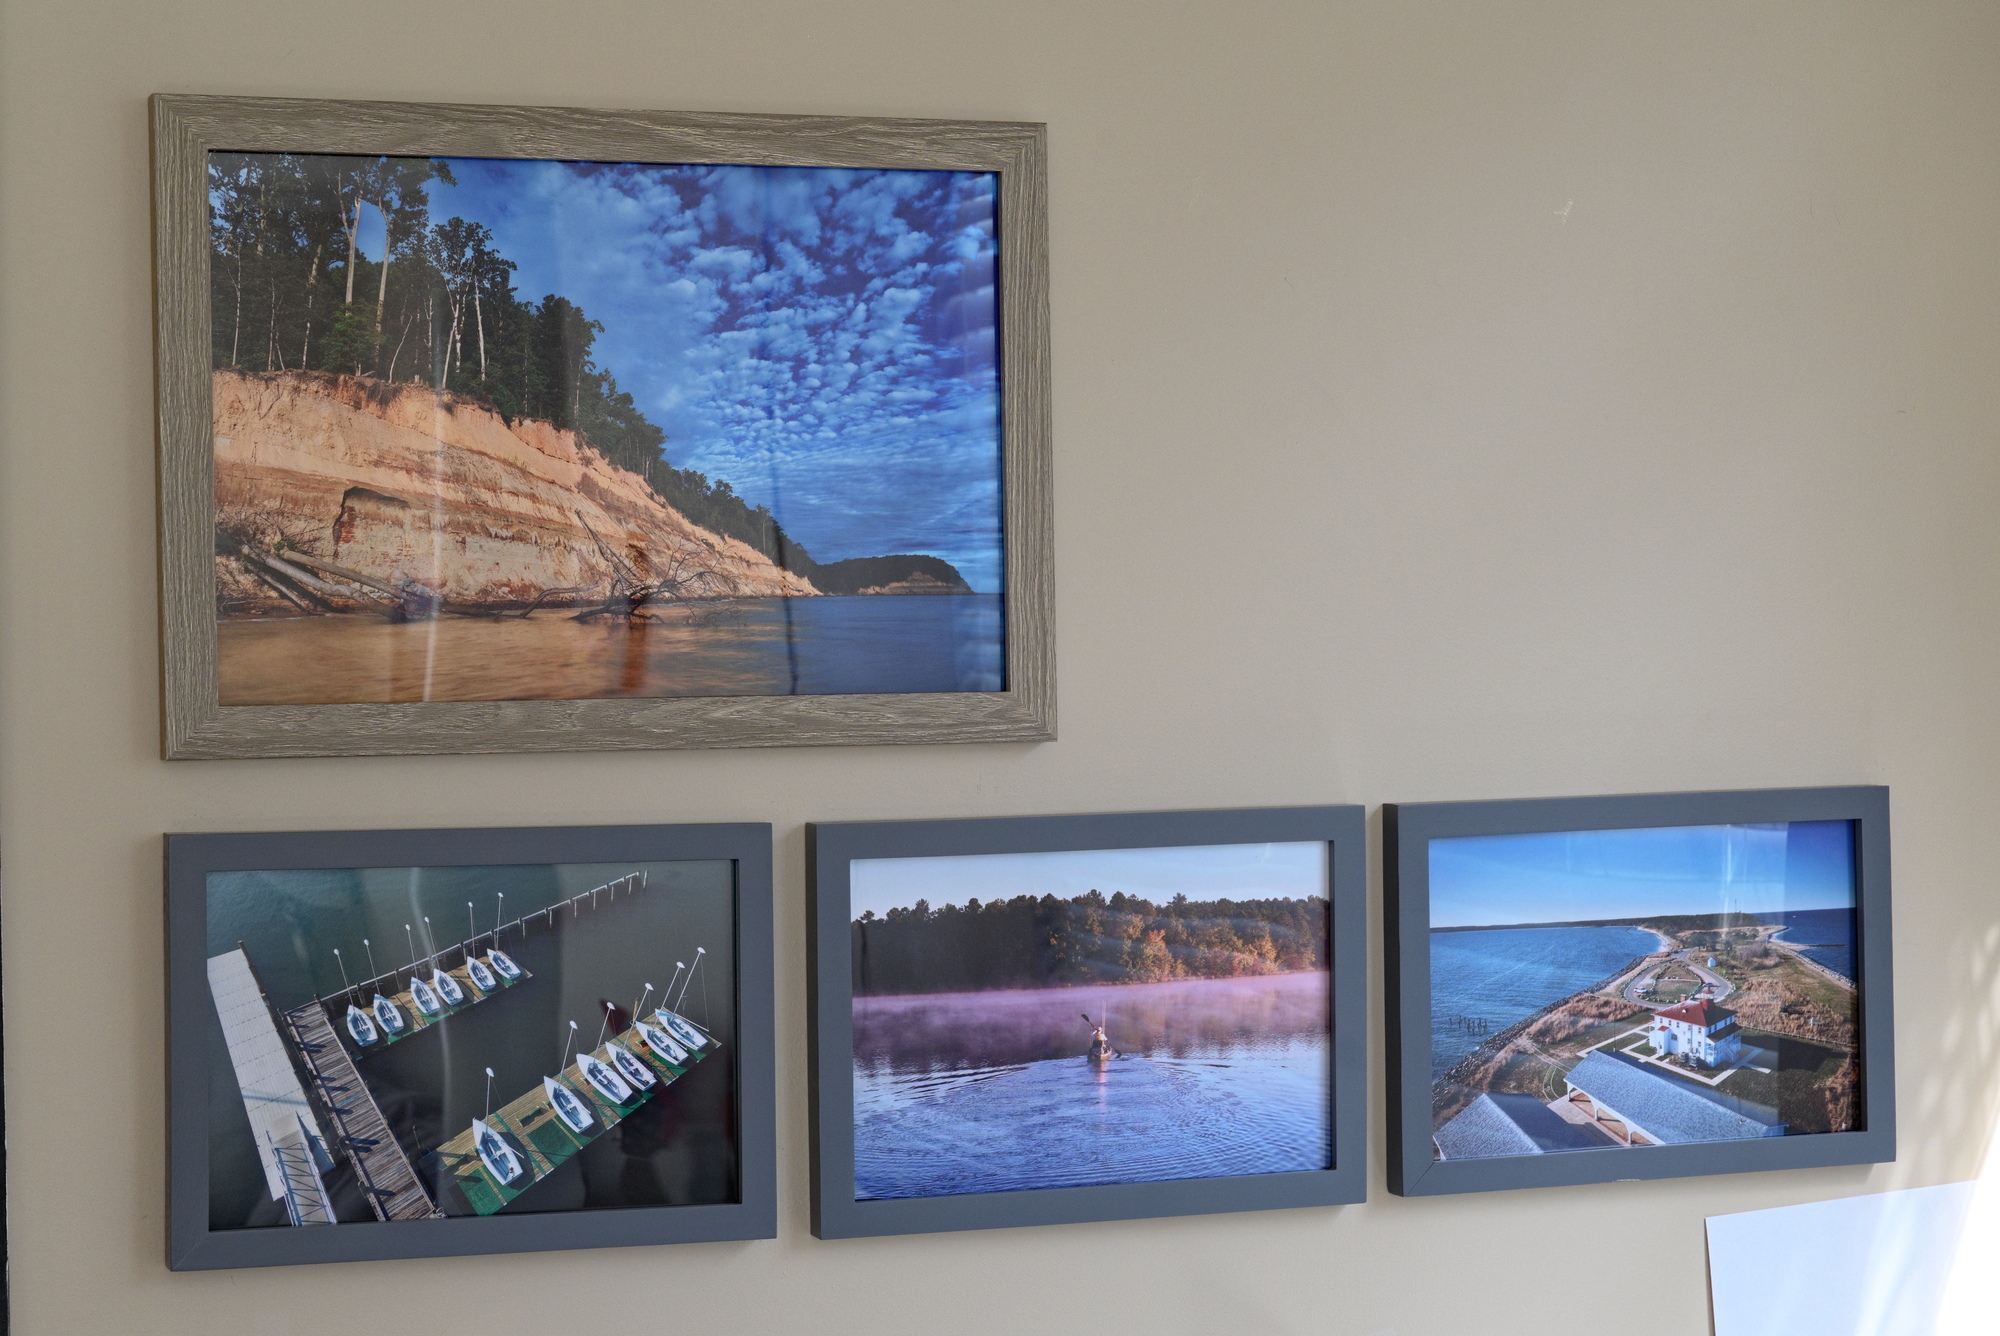
My original plan was to take another aerial photo of the Point Lookout fishing pier from directly above, getting as much in the shot as possible without requiring any cropping so that it could fit a 12×18″ frame properly, probably with the pier lined up diagonally across the frame. It seemed possible based on the south or southwest wind that was forecast. It was supposed to be at least 8 mph all day, and increasing as the day went on, eventually with gusts above 20 mph, so I decided to go early to get the softest light and least gusty winds.
When I got to the location, I encountered a few problems. First, the wind was quite unsteady and seemed to be frequently below the forecast 8 mph. I had just finished framing up my workhorse Rokker kite, which is also my best kite for light winds, when I encountered the second problem: one of the ferrules joining the three-piece carbon fiber main spar had come unglued and slid into the center tube of the spar, rendering the kite useless. Thankfully, I also had my Mini Dopero with me, so I had no choice but to go with that one. By this point, there were periods of stronger winds, and based on the forecast I thought this smaller kite might actually be a better choice anyway.
After getting the kite ready to go, I was able to get it in the air after a few tries. However, the wind was still a problem, as it remained unsteady and went through frequent periods where it was below the kite’s minimum limit, requiring me to constantly work the line to keep it in the air. Eventually, I had released about 150 ft, which is about the most I wanted to do before attaching the camera (the planned shot really needs as much altitude as possible), but I still wasn’t confident enough in the wind to do so. I flew for a while longer and decided it wouldn’t hurt to to test the wind at a higher altitudes while I waited for it to hopefully become more reliable. Before long, the wind died almost completely, and the kite came down. This is when the third problem arose: I had to hastily pull in line and leave it on the ground, and it ended up hopelessly tangled. My prospects of achieving the planned shot were dropping quickly now.
I spent several minutes trying to untangle the line before deciding it was just not going to happen. To salvage a chance at some photos, I removed the first 200 ft of kite line, which had been spliced to an additional 500 ft of line with a double fisherman’s knot. Since the tangle was all in the first section of line, this operation left 500 ft to work with. Even though this would likely not be enough for the shot I wanted, I decided that after all this trouble, I might as well at least try to fly some more.
My luck started to change at this point, as I ended up with a good 30 minutes of fairly steady, albeit relatively light, wind. Soon, my radio-controlled KAP rig was attached about 50 ft below the kite and I was letting out more string. I captured as many images of the fishing pier as I could, but it was clear that the lack of line wouldn’t be the only problem with my plan; the wind was just not in the right direction to take the kite out far enough over the pier. This at least made me feel a little better about not having the extra 200 ft of line. I decided to also take a couple shots in other directions just for the sake of seeing some different views. Here is one of them, looking north up the peninsula:
It’s not wall-hanging material, but it’s still a nice view. By now, it was clear that the direct-overhead shot wasn’t going to work, so I decided to go to Plan B: walk down the shoreline to capture more of the pier from an angle. The best of these was one of my last, which is at the top of this post, and I’ll put it here too:

I’m really quite fond of this shot. I love the mix of brown, green, and blue colors in the water, the X shape formed by the pier and sand bar underneath, and the quite satisfying composition with all elements fairly well balanced. Is it worthy of hanging on the wall? Maybe. If anything, I may print it out in the smaller (8×12″) size and promote one of the others to the remaining 12×18″ slot. But I will wait and see if I get anything better before winter arrives.
The flight ended abruptly as the wind dropped below the kite’s minimum speed again for a prolonged period. Thankfully, I had plenty of room to move down the shore, and I managed a soft landing for both the KAP rig and kite through a combination of running and winding. Upon reflection, it was a good KAP session — certainly better than I expected after running into so many problems — and an enjoyable way to spend a cool autumn morning. Now to fix that Rokker spar and plan my next session.
Low and High KAP at Flag Ponds Nature Park

Flag Ponds Nature Park is a place with hiking trails, ponds, and a large beach in Calvert County, Maryland. The beach is wide open and features an observation deck and large tide pools with interesting shapes. I brought my kite and radio-controlled KAP rig to do some aerial photography. There was a reasonably steady north wind of about 12 mph, which my Rokker kite handled with ease, and the whole process of launching the kite, attaching the rig, taking pictures, and bringing everything back down was uneventful (a good thing!).
The first subject was the observation deck. I started with a very low shot and then proceeded to get one from a bit higher, looking down on it. Both turned out nice. I find it interesting how different the water color looks depending on the viewing angle. At low angles, it reflects the blue of the sky, but looking straight down, it takes on a deep green hue. For the first picture, I was standing very near to the launch point, and the camera was less than 50 ft high. The second one required me to walk along the shore of the tide pool and raise the camera up to 100-200 ft.


Next, I headed towards the shore, where many people were playing on the beach. Interestingly, I hardly saw anyone swimming in the water. That may have had something to do with the posted warning about jellyfish, which are abundant in the waters of the Chesapeake at this time of year. Hunting for crabs is a common activity, though, as is sunbathing. I lowered the kite a bit again to capture the a group of people on the beach, and I chose a 16:9 crop to remove extra sand and water from the composition.

Last, I needed to get a shot from up high to show the shape of the tide pools. I walked up and down the beach while I let out the line but ended up back near the south end of the beach, where I had started out. I had to let out all 700 ft of line and stand at the end of the beach to capture these tide pools, but it was worth the effort to get a picture of this very interesting geography.

I learned later by looking at satellite imagery that this was low tide, and the beach looks entirely different at high tide. The placement of the observation deck also makes a little more sense when you consider high tide. Check it out here! That extreme difference in itself is an excellent reason to come back again when the tide is high. I also did a vlog documenting this KAP session. You can watch it below, and it’s also on my KAP Vlogs page.
Boats at St. Mary’s College Marina

Well, I’m slacking, because it’s been over a month since I did some kite aerial photography at St. Mary’s College Marina, and I am just writing about it now. However, it has kind of worked out, because in the meantime I came across a new RAW photo editor (ART), and I much prefer the results I was able to get out of it with this particular set of pictures than I had gotten from my other editor (DxO Photolab 5, an excellent paid program with some top-notch features, but no official support for my camera, requiring some hacks to get it to work).
Anyway, I had spied this location when searching for aerial photos of the college a few months ago. I have taken some aerial photos at the college previously, but they were always done from a field behind the school, not down by the water. It turns out there is a small beach and some docks with enough space to launch a kite, so I decided to go for it. Here is what the marina looks like from the air, courtesy of my kite:
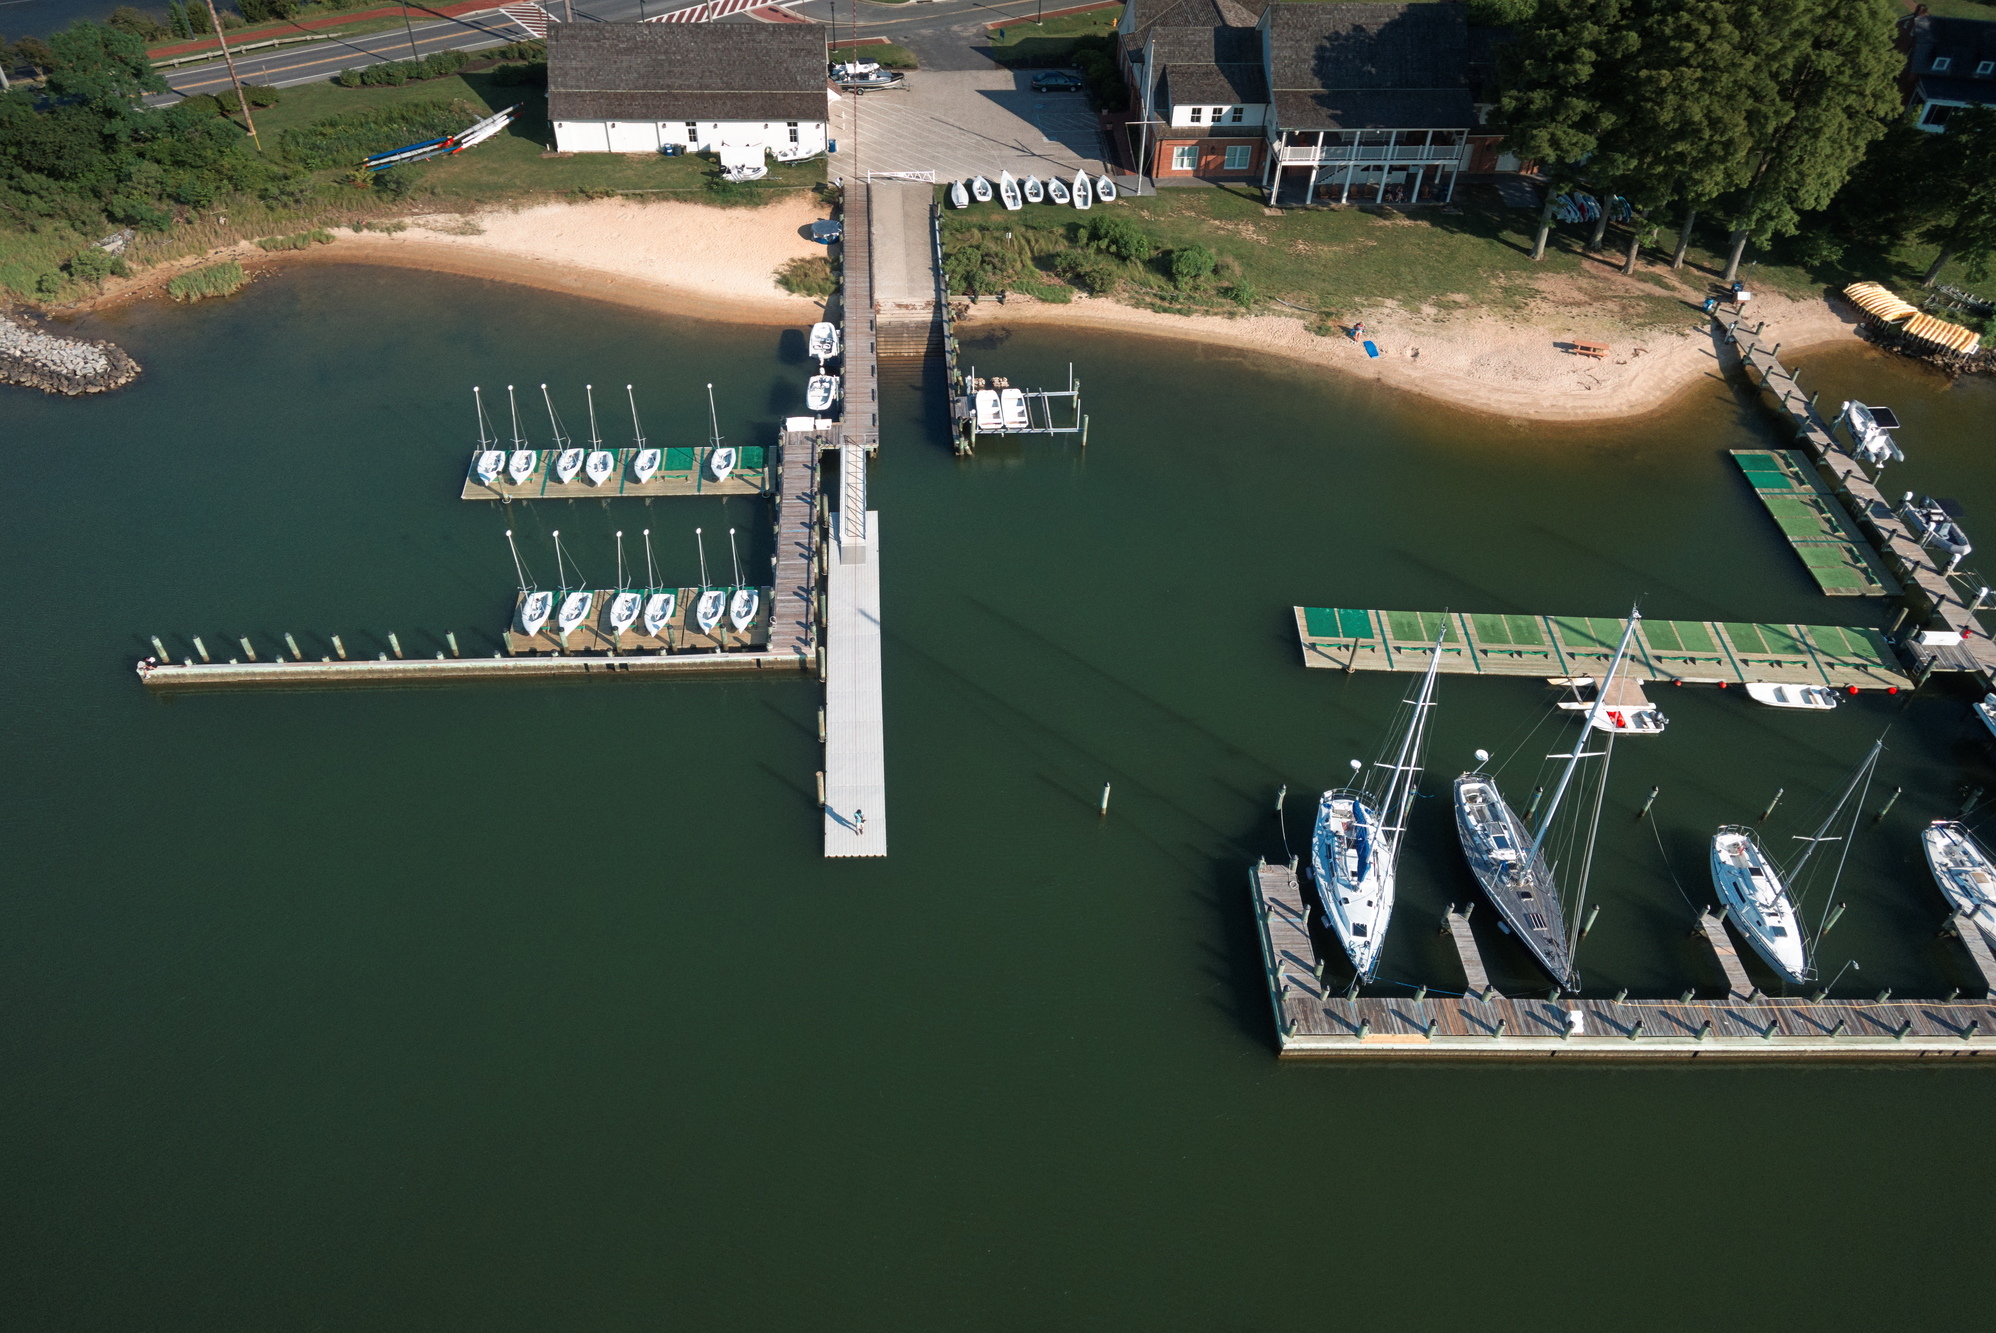
The small beach at the top left of the image was my initially planned launch location. The wind was around 10-15 mph from the southeast (from the upper right towards the lower left in the photo), with gusts as high as 20 mph, so I chose the smaller of my two kites, the Mini Dopero, for this session. Launching proved to be much more difficult than expected, however. The buildings were blocking the wind at the beach and causing severe turbulence, so much so that the local wind would change direction by 180 degrees within the span of seconds. I managed to get the kite about 100 ft in the air at one point but then brought it down for some bridle adjustments. After that, I only succeeded in crashing the kite into the water a couple times.
With frustration increasing, I remembered that one definition of insanity is doing the same thing over and over and expecting a different result, so I decided to change my approach. Instead of launching from the beach, I walked to the end of the dock (where you can see me in the picture above) to get away from the turbulence. That turned out to be a great idea, because the kite immediately took to the air with no problems, and after letting out a couple hundred feet of line, I could bring it back to the beach to attach the camera while maintaining stable flight.
The plan was to get high and take a photo of the college, across the street from the marina. However, due to the distance and the school’s height above the water, I wasn’t able to get that shot. It may be possible on a day with steadier wind, so that the camera can be attached closer to the kite (to get higher) and maybe with a panorama. The two below were the closest I could get, which show some of the school buildings, but the main campus is farther to the left and across the street.


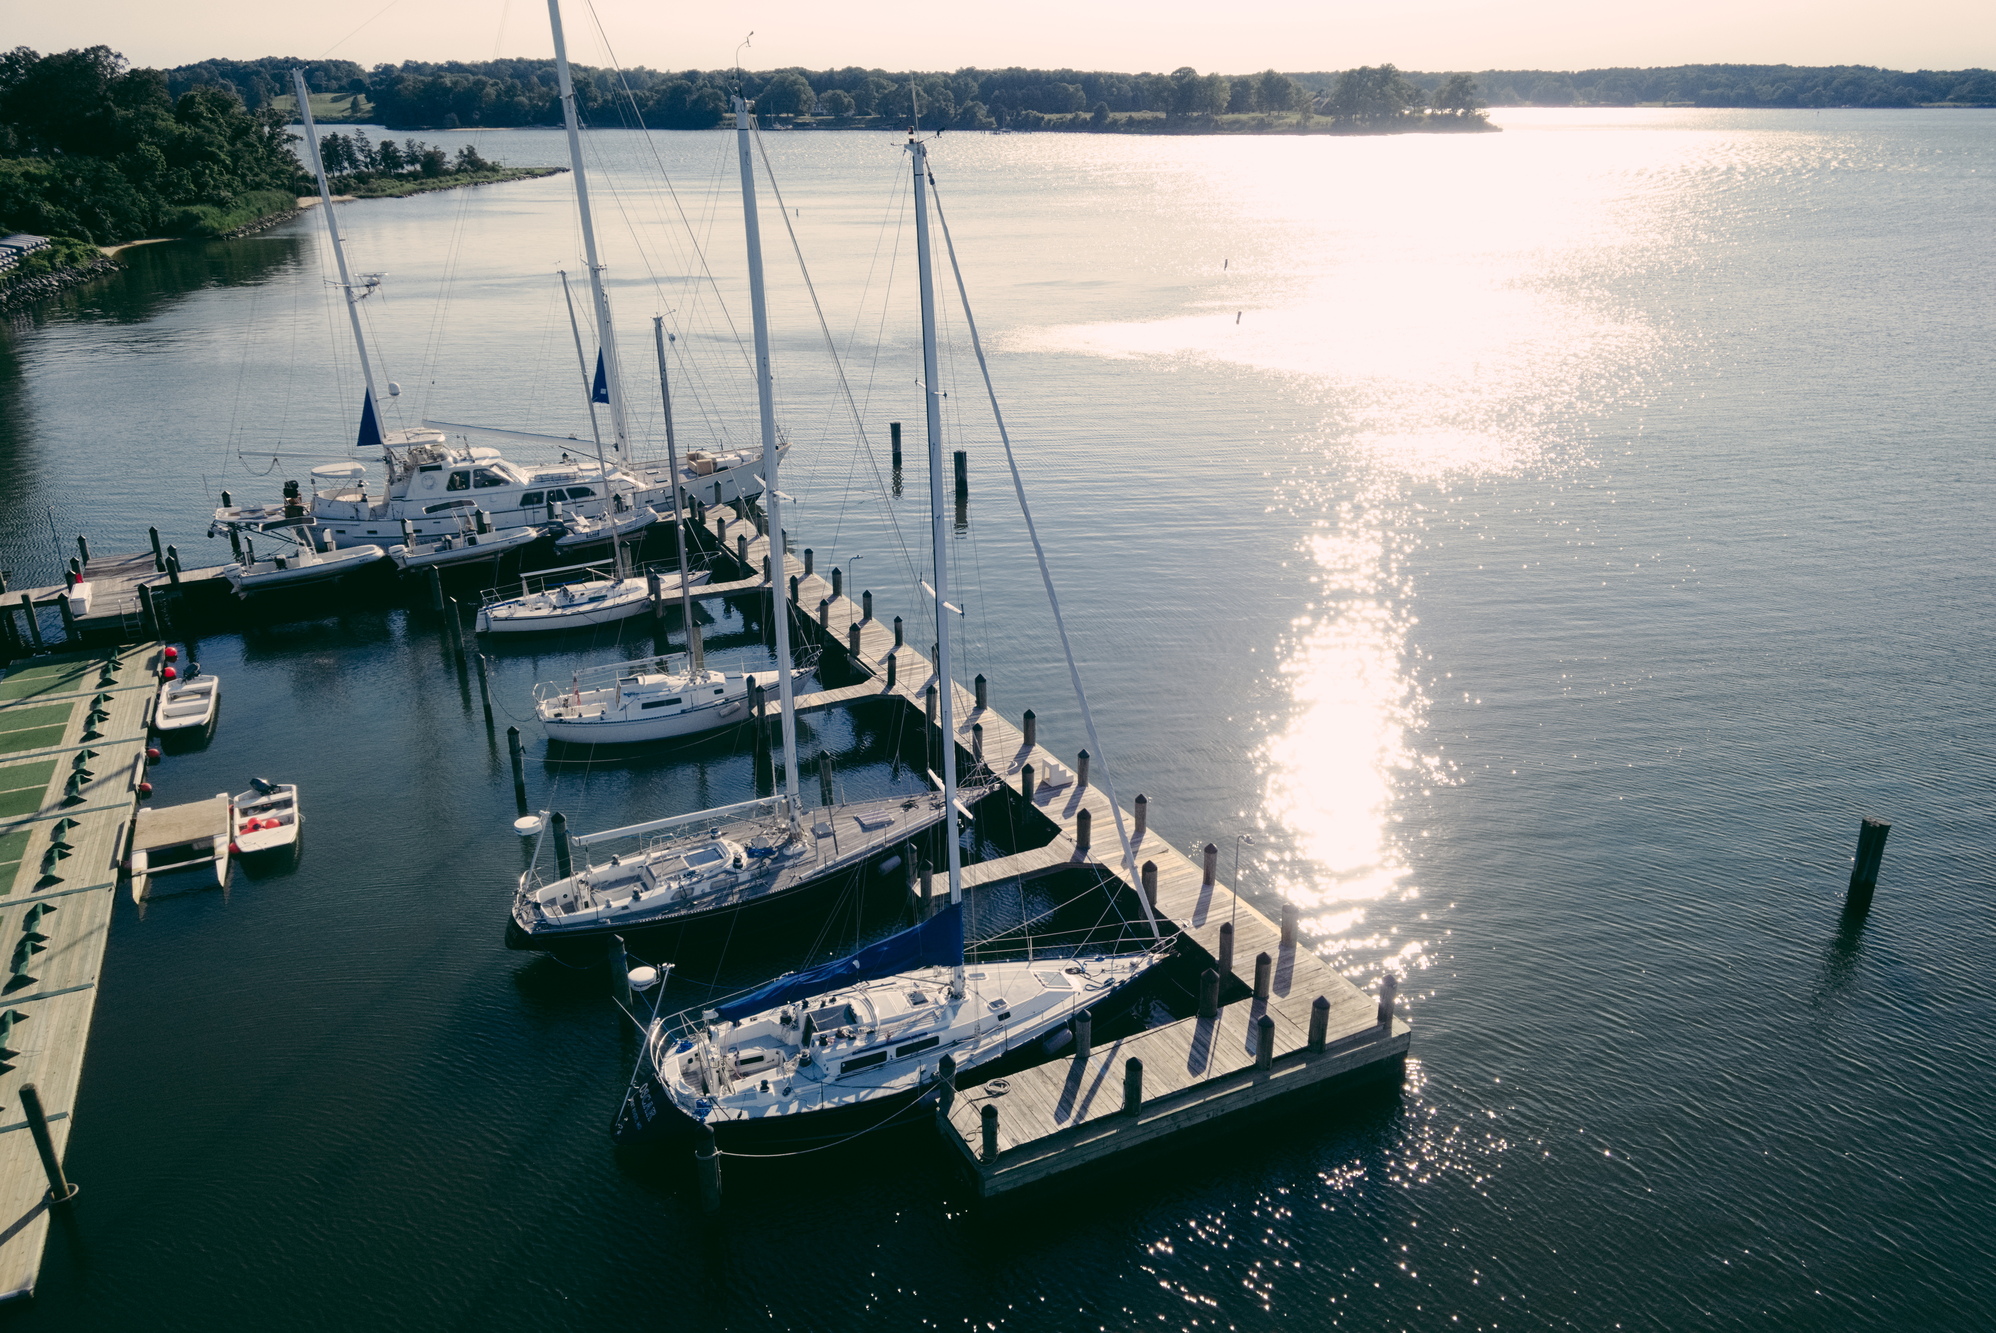
My favorite images ended up being these lower-altitude shots of the boats docked at the marina, below. The first one is actually one of my personal all-time favorites, so I especially like that one, of course. (As an aside, as I’ve progressed with my kite aerial photography, I’ve come to appreciate low-altitude shots much more than I originally did. At first it was all about getting as high as possible and seeing what familiar places look like from hundreds of feet in the air, but the novelty of doing that wears off after a while. Now it’s become more about art, which is often best created with low-altitude shots of specific subjects. Of course, there are still times when you need to get high to capture the subject, though.) I also liked the boats anchored out in the water, looking out the other direction from the marina.


It started out frustrating but ended up being a successful and very enjoyable KAP session. I’ll definitely come back again sometime to see if I can capture that high-altitude panorama of the college.
The Pier at Solomons Island

The Pier is an aptly-named and very popular restaurant in Solomons Island, Maryland. It’s been on my list of KAP subjects for a while, but it requires a primarily east wind to fly a kite there, which is not very common around here. June 5 seemed to be the day for it, as the wind started out from the northeast in the morning, and it was supposed to remain that way for most of the day before slowly decreasing in speed in the late afternoon.
I was able to get there in early afternoon and was happy to find that there was still plenty of wind — actually greater than 10 mph rather than the forecasted 8 mph, which might not have been enough — but it was from the southeast rather than the northeast. The plan had been to fly from the north side of The Pier, but that wouldn’t have worked out so well with a southeast wind. That turned out to be a good thing, though, because the south side had better accommodations for kite flying, including a thin strip of grass with trees beyond the sidewalk, and it also allowed me to get the Governor Thomas Johnson Bridge connecting St. Mary’s and Calvert counties in the background.
Once I found a suitable place to set up the kite, I waited for a clearing in the people walking by on the sidewalk and released it into the air. The 10+ mph wind presented no problems in getting this kite up and away. Once it was about 150 feet in the air, the next task was tying it off somewhere and attaching the rig. I normally use a dog stake for this purpose, but I couldn’t get it to go into the hard ground underneath the grass strip. Thankfully, the trees made a good alternative option, so I wrapped the line around one of them a few times and waited for another lull in the number of passersby. Once attached, I let out another ~200 feet of line and started taking pictures.


It ended up being a fairly short session. Upon checking the video downlink from my KAP rig, I decided that the first shot was higher than I wanted. I still took a bunch, of course, and edited the best of them, which is the first one above. For the next shot, I moved closer to The Pier and took in about half the line. I was happy with that composition, and since I’m always wary of wind forecasts that say the wind is going to die down, I decided that was good enough for the session. That shot is the second one above. Which do you prefer?
During the course of the flight, I had some nice interactions with people walking by. Most thought the kite and aerial photography rig were pretty interesting. One asked me if I had caught any fish, thinking I was fishing instead of flying a kite. She must not have been a fisherman (fisherwoman?) or kite flier to have made that mistake, but that’s okay. It’s probably good for me to get out of my comfort zone and talk to people even though I usually like to be in solitude while flying.
Here is a video detailing this KAP session. There are more on my KAP Vlogs page if you like that format.
A Row of Posts in the Chesapeake

Last year I did some KAP at Elm’s Beach Park, a beach on the Chesapeake Bay. One of the subjects was an interesting row of posts out in the water. I couldn’t get as close to it as I wanted at that time, though, and I also decided it looks better in a vertical (aka portrait) orientation, but the rig I was using at the time was not capable of that. My new radio-controlled KAP rig can be switched from horizontal to vertical orientation, so I decided to take another shot at this challenging subject.
The forecast called for a west wind around 10 mph, which should be perfect for flying out over the water with my Rokker kite. At the beach, the wind seemed much more unstable, with infrequent gusts that must have been close to 20 mph, and many thermals. I had to adjust the bridle twice and add a drogue to get the kite flying in a way that seemed steady enough to risk attaching the rig. After those adjustments and letting out 200 feet of line, it was ready for KAP. I attached the rig and started wading out into the water, equipped with a bathing suit to get as far as possible.


Thankfully, once the kite got away from the beach, the wind was steadier, so there were only a couple scary moments where I feared the rig would come down in the water and had to take action. Unfortunately, with the R/C transmitter hanging near my waist, I couldn’t wade too far without risking getting it wet. One mistake that I made was forgetting to remove the lens cap from the micro FPV camera that provides the video downlink for composing pictures. It is translucent, so it was still possible to see what the camera was pointing at, but not easily, especially since the picture on the monitor is sideways with the rig in portrait orientation. After about 45 minutes of KAP, I decided to head back to shore and bring it down.
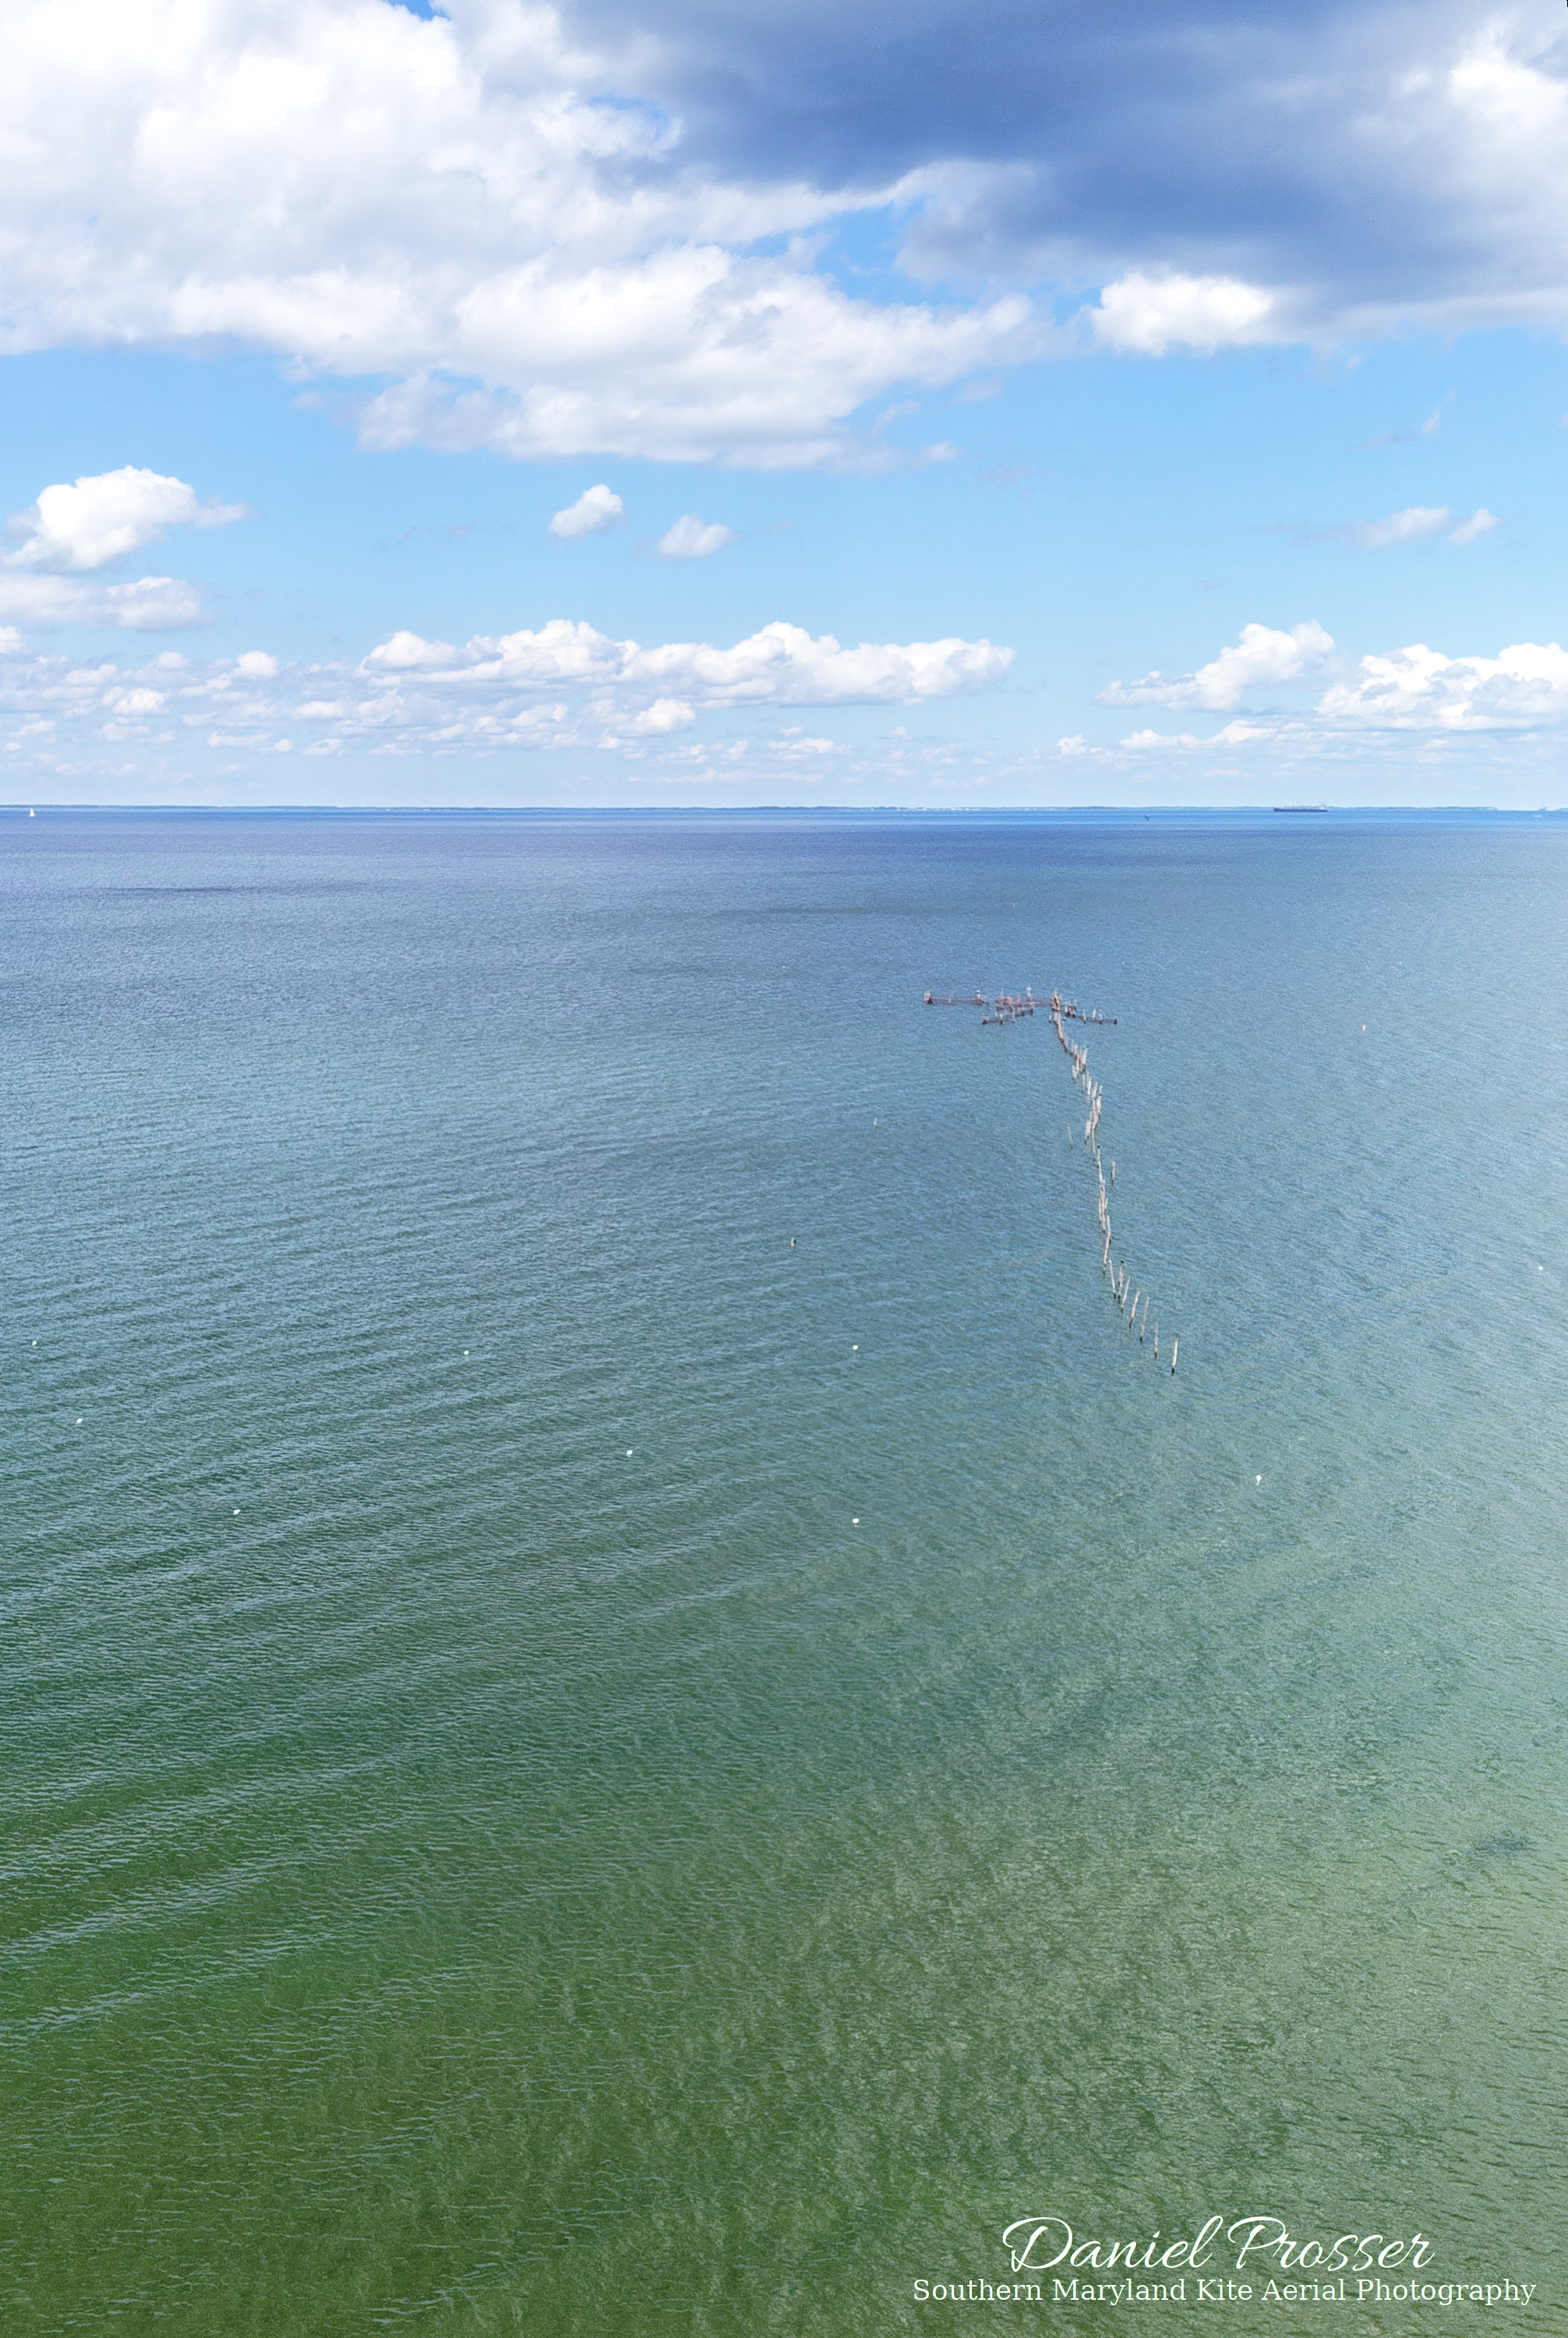
Here is the best photo of the posts I got from the session. It ended up not being as close as I was hoping, and I had to crop quite a bit to get it, but I still like how it came out. At times when the prevailing wind direction was west, it also tended not to be that strong, so the viewpoint is not that high.
This may not be a “portfolio piece,” (not that I have a real portfolio, but it probably won’t go in the Favorites gallery), but I have some ideas for improving it. Next time I’ll use a shorter strap for my R/C transmitter so I can wade farther into the water, and I’ll attach the rig closer to the kite and let out as much string as possible to get the camera closer to the posts. Regardless, this was a fun and rewarding session!
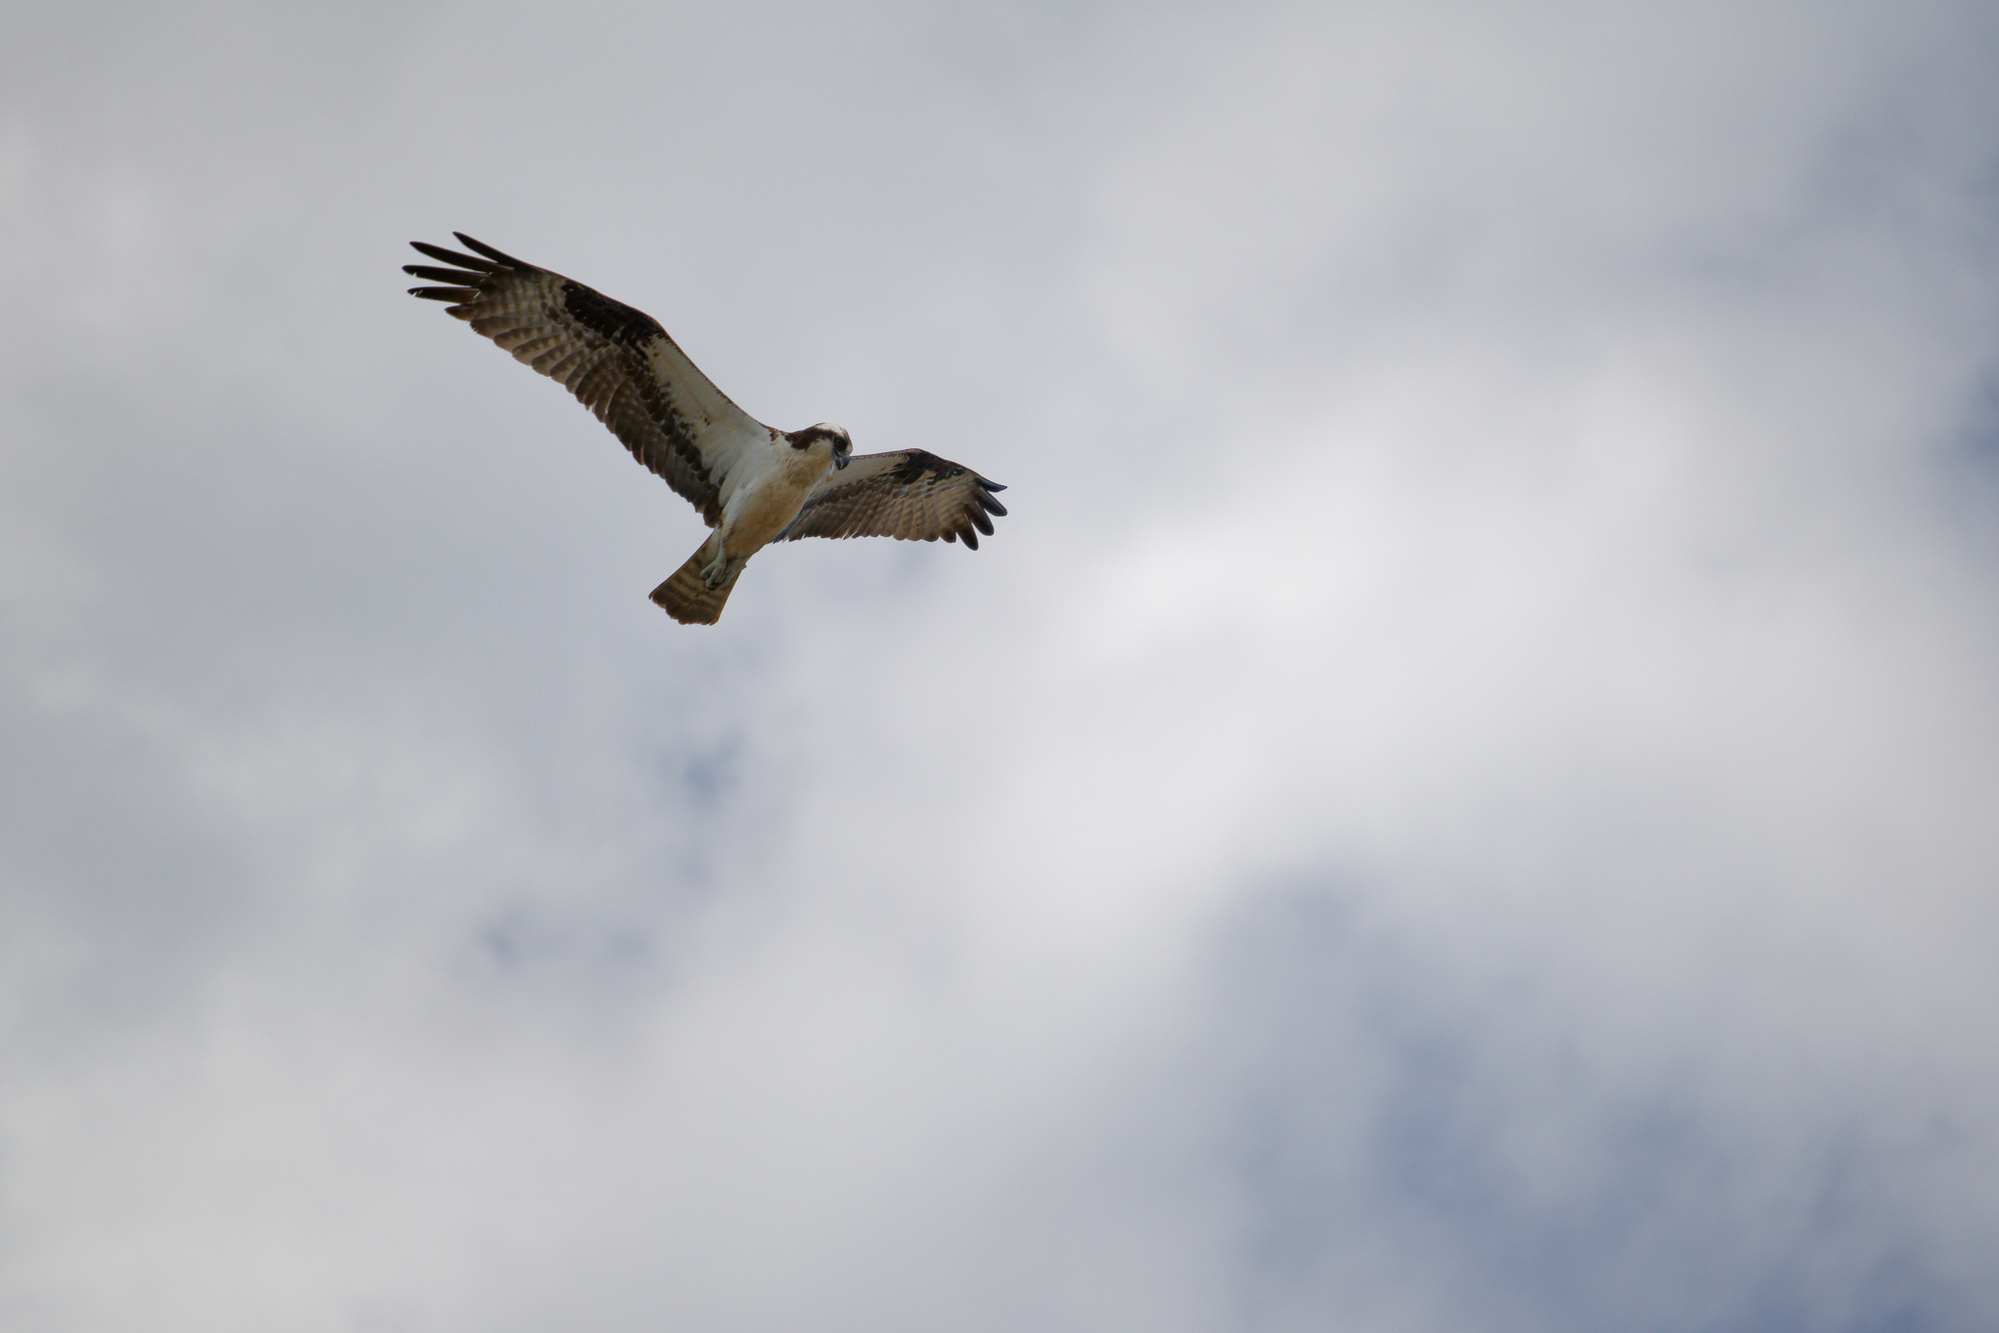
If you enjoyed this post, you may also enjoy some video footage of the kite, camera, and wildlife below.
