My Rokker is a light wind kite. It is really a Rokkaku with a vent just ahead of the lower spreader, which makes it kind of a cross between a Rokkaku and a Roller (hence the name Rokker, though maybe Rokk and Roll would be better). It is based on smac’s concept, first presented in the KAP forum.
I built the Rokker to replace my Barn Door kite, which was found to have some bad tendencies that resulted in a crash and destruction of a KAP rig. Though it is not as large as the Barn Door kite, it is constructed with very light Icarex PC31 ripstop polyester and carbon fiber tubes, resulting in a very light weight that allows it to fly in light winds. It is lighter than Mini Dopero kite but has 50% more sail area. Compared to a standard Rokkaku, the vents increase its gust-handling capability and increase the top end of the wind range. Another benefit compared to either of my two other kites is that, if the two spreaders are left in, it is very quick to set up at the field, but it can still pack up to a very small size for travel if all the spars are taken out and taken apart into their three pieces each.
| Height | Width | Area | Weight | Approximate Wind Range |
| 84 in | 67 in | 31 sq ft | 12 oz | 6-20 mph (Bft 2-4) |
Materials
As mentioned above, I used Icarex PC-31 ripstop polyester sourced from Kites and Fun Things in the USA for the sail. It’s not exactly cheap, but it’s very light, which is important if you want to use the kite in light winds, and you only need three yards of it. To sew the sail, use a high-quality polyester thread. The one I used is called Gutermann Sew-All thread. A size 14/90 needle seems to be best for this thread and sail material.
Each spar was made from three Sky Shark P4X Camo carbon fiber tubes, also from Kites and Fun Things. These camo tubes are very cheap as far as wrapped carbon tubes go, and I doubt you’ll find them cheaper elsewhere. They need to be cut down to the proper length for each spar. I chose to leave the center section of each one at the full length and then cut down the outer sections as needed. To cut them, I used a Dremel tool with a diamond cutting wheel and a sander. It’s recommended to make the sail first before cutting the spars, because it’s not guaranteed that your sail will actually come out exactly the same size as the plan specifies. If you use the tie-down method to secure the horizontal spreaders to the sail, it is a good idea to leave the spreaders slightly longer than the width of the sail.
Other materials that will be needed include: ferrules to join carbon tubes together, four arrow nocks, two end caps, flying line (I use 200 lb for the bridle and the line itself), dacron for the patches, and webbing for the pockets.
Construction
If you plan to use these instructions to build a Rokker, please read through the whole thing several times first to make sure the process is completely understood before starting!
This site is a good source of information for making any of the knots mentioned below and for making kites in general. It wouldn’t hurt to build one or two of the dowel kites on that site first before attempting a bigger, more expensive one like the Rokker. You will learn a lot and have lots of fun too! Note that some of my other KAP kites, including the Mini Dopero and Barn Door, are directly scaled-up versions of designs on that site, adapted for stronger materials.
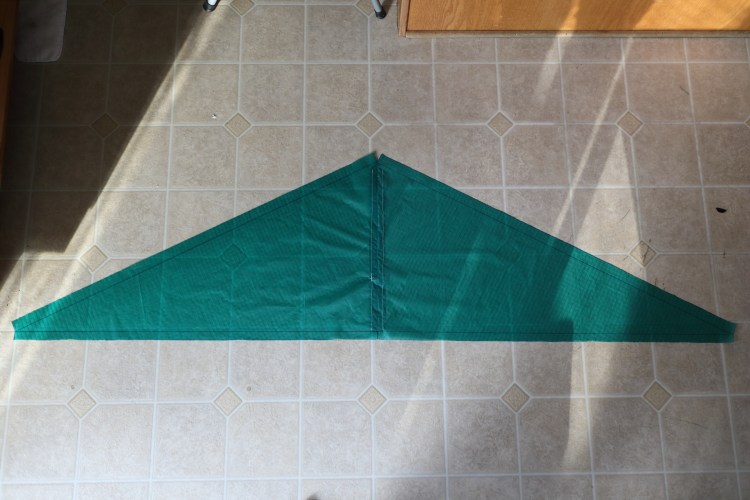
The first step is carefully drawing and cutting out the pieces from the fabric. You definitely need a straight edge. Some sort of right-angle tool, like a t-square or triangle, helps too. I didn’t have one of those, and, despite my best efforts, the sides of the rectangular pieces didn’t come out quite square in the end. It was a small enough error that I could make up for it by adjusting the hem and seam allowances, however.
This Rokker has a 5:4:3 ratio, meaning that the width is 4/5 the height, and the distance between the spreaders is 3/5 the height. With a height of seven feet, I’ll leave figuring out the other dimensions as an exercise for the reader. 🙂 If you make it in six pieces, they all fit on three yards of Icarex if laid out in the manner shown below.

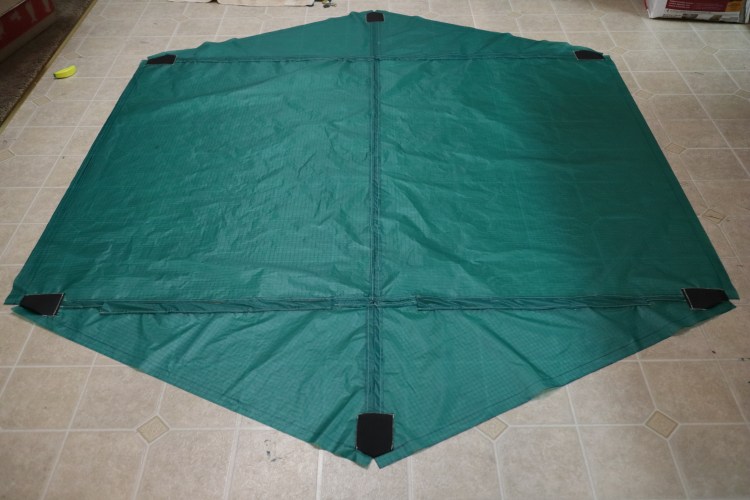
I used seam allowances of 3/4 inch and hem allowances of 1 inch (folded over 3/8 inch from the outer edge) everywhere. The lower sail requires a larger hem forming a sleeve for the spreader. For this I used a 1 3/4 inch allowance, still folded over 3/8 inch from the outer edge. The picture below shows how the pieces will go together.

Seams
The seams are probably the trickiest and most critical part of the construction. They are tricky because sail material is very slippery, which makes it difficult to keep the pieces from sliding as you go. I use a copious amount of pins and am very careful to keep the pieces aligned and pulled tight as I go. I also use a rolling presser foot, which seems to help a little bit too. A walking foot would probably be even better. If you haven’t worked with this material before, be sure to practice on some scraps (preferably some long ones) before you dive in. I use a simple plain seam with straight stitches. The slideshow below details the process of sewing all the pieces of the sail together. There are also a couple of hems that need to be done in this set.
Sew the top triangles together 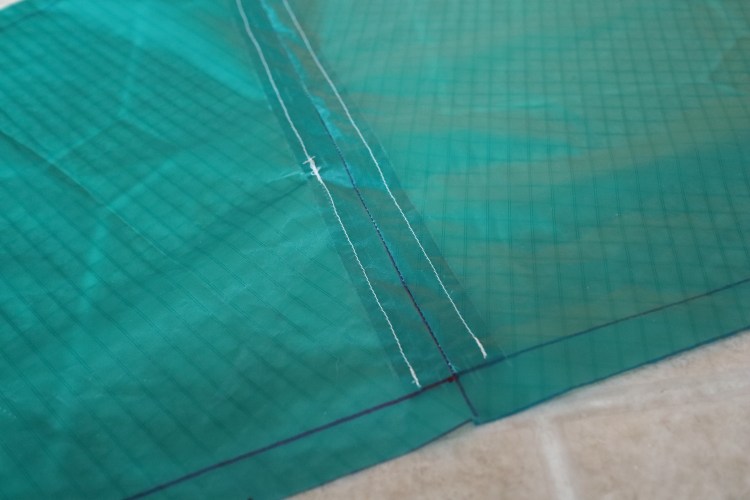
I use a simple plain seam with a straight stitch 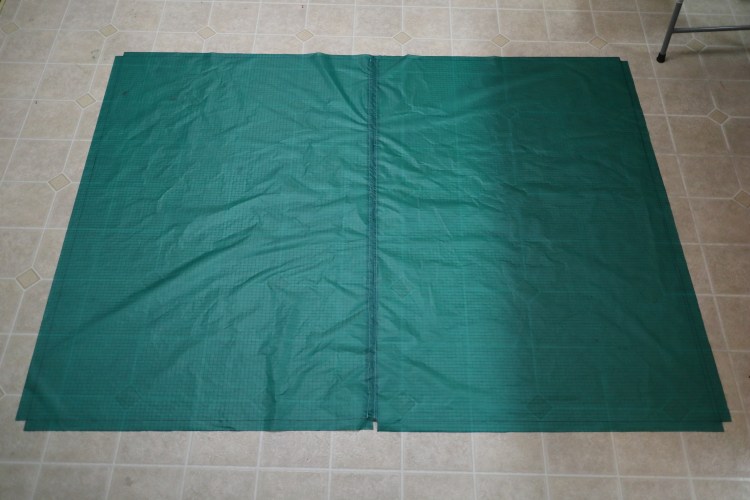
Sew the two rectangular halves together 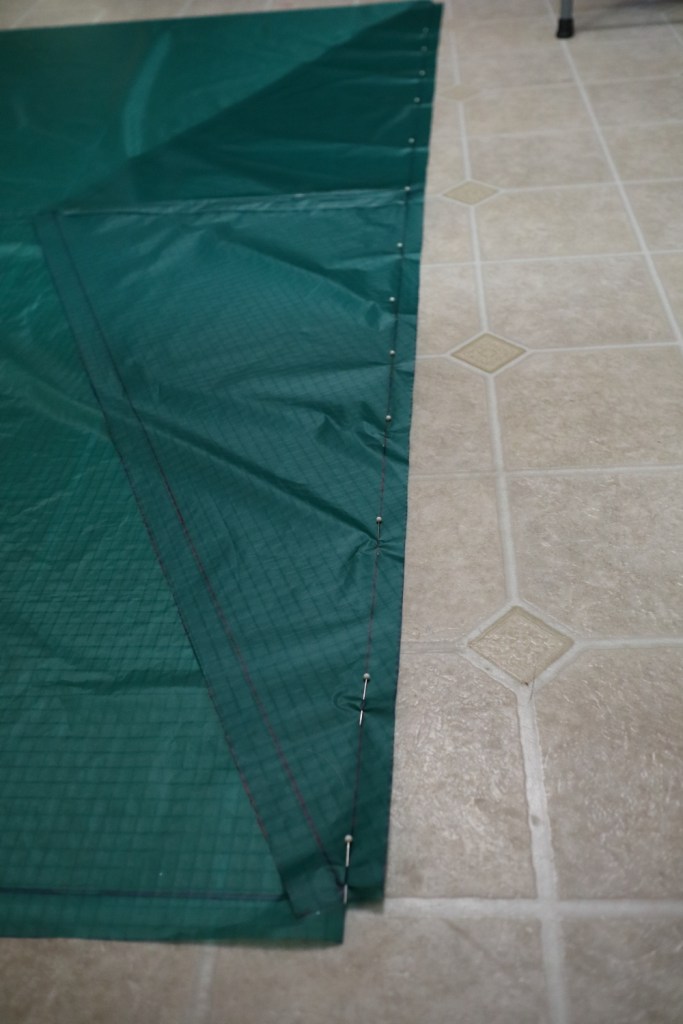
Pin the upper triangles to the rectangles along the seam line 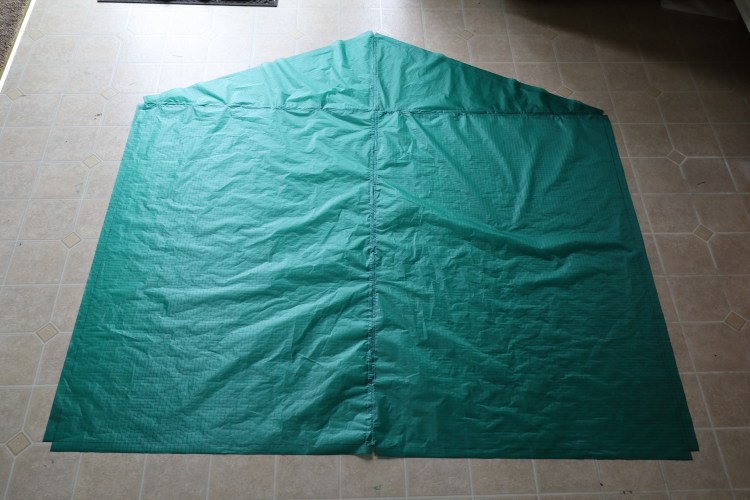
Sew the upper triangles to the rectangles 
Sew the lower triangles together 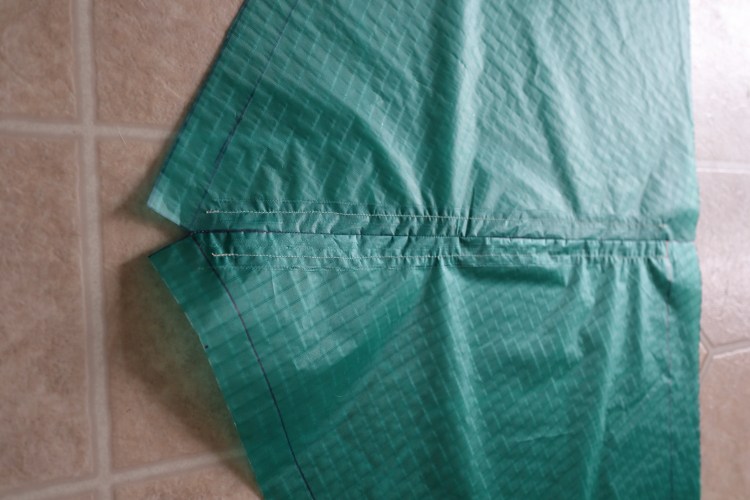
Lower triangle seam detail 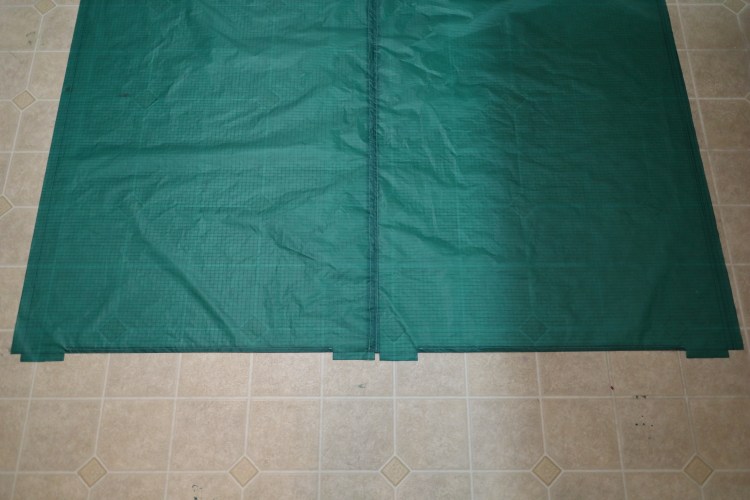
Leave 4 inches near the tips and 8 inches at the center to sew the upper and lower sails together. Sew a hem for the remaining length on the rectangles. 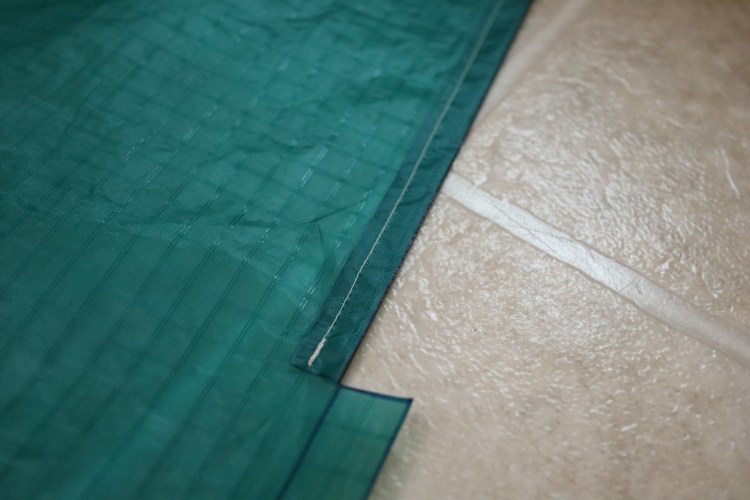
Hem detail – upper sail at interface 
Larger hem on lower sail serves as a spreader sleeve 
Both sleeves done 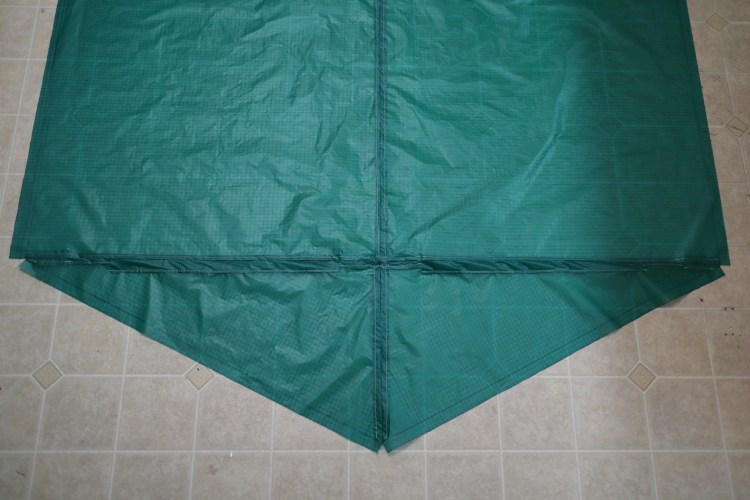
Sew the upper and lower sails together at tips and center
Corner Patches
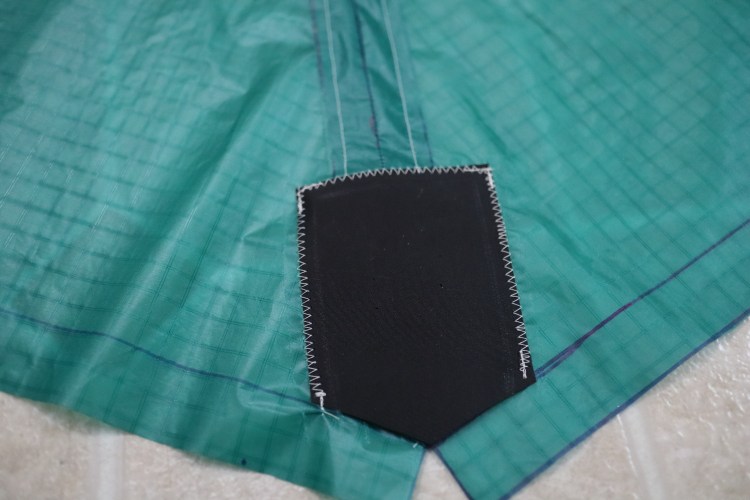
The next step after sewing the major pieces of the sail is to sew on corner patches. I use dacron that comes in a roll three inches wide, and each patch is nominally four inches long, cut to match the edges of the sail. I used a zig-zag stitch to sew them on, but a straight stitch would work fine too. Maybe it goes without saying, but the corner patches should all be sewn on the back of the sail. They should not be sewn along the edges of the sail, because they will be sewn down there when the hems are done in the next step.

Hems
Hems are the fun part. For each hem allowance of once inch around the edge of the kite, fold it over approximately 3/8 inch from the outer edge and crease it. Then fold again along the marked edge of the sail, creasing again. The folded fabric should end up against the back of the sail, going over the corner patches. One helpful trick to make good creases is to use a small iron (with adjustable temperature) at low heat. I use the type of iron intended for applying heat-shrink covering film to model airplanes, with the temperature set to 160 degrees Fahrenheit. This makes really sharp, permanent creases without damaging the fabric. If you use any type of heat, just be very careful not to use too much, because the thin fabric can easily be damaged or melted if you overdo it. Practice on some scraps first.
After making the creases, sew the hems down. Be sure that the stitch passes through both folds of fabric so that they can’t come unfolded later. Either a straight stitch or a zig-zag stitch works fine for the hems. I used a zig-zag stitch, mainly because it looks neat. I also use pins to hold the hems in place as I sew them, but this is probably not necessary if your creases are good and you know what you’re doing.

Remaining patches and other things to be sewn
Now, some interior patches are needed. Add one large four inch by three inch patch to the center where the upper and lower sails join, which will add reinforcement to that relatively short seam. Next, add a 2 1/2 inch by 1 1/2 inch to the very center of the sail. A sleeve for the vertical spar will later be sewn onto this patch. Finally, add some one inch by two inch patches halfway from the center to the tips where the horizontal spreaders will go, which the bridle will pass through. For the lower spreader, these patches should be sewn to the lower sail only. Note that if your lower spreader sleeve is going across these areas, you’ll have to cut a small section out of it to sew the patches on, then sew down a small hem on top of them. A better option, if you are reading this through before making the kite, is to create these little cutouts before sewing the sleeve in the first place. Next, sew a two inch by one inch piece of dacron to the center patch, lifting it up slightly in the middle to create a sleeve for the vertical spar.
Sew interior patches to back of sail 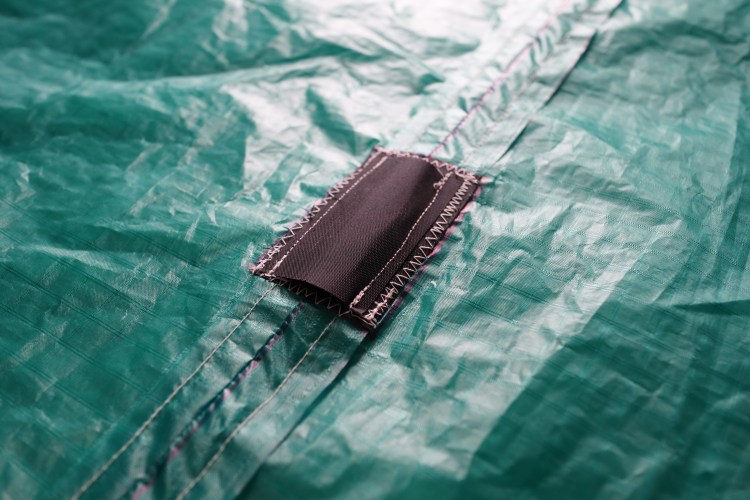
Make a sleeve for the vertical spar on top of the patch in the middle of the sail 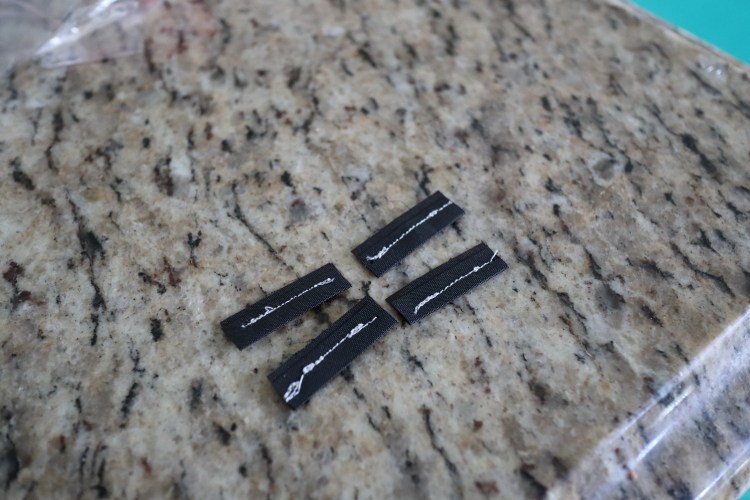
Create spreader tie-downs by folding over thin pieces of dacron and sewing 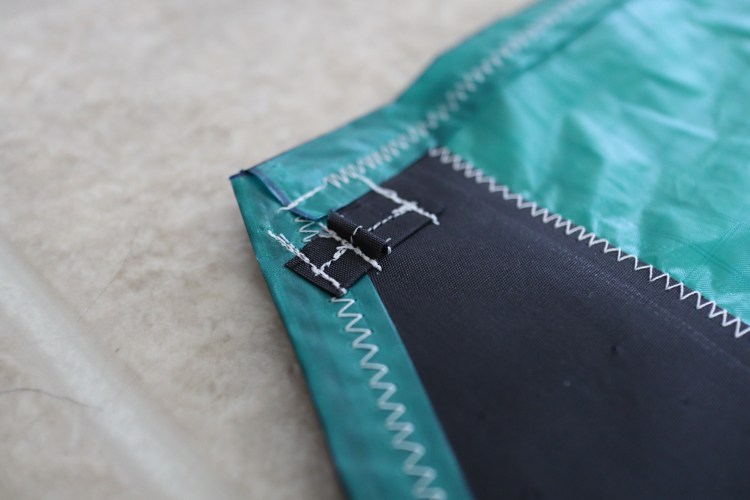
Upper spreader tie-down 
Lower spreader tie-down 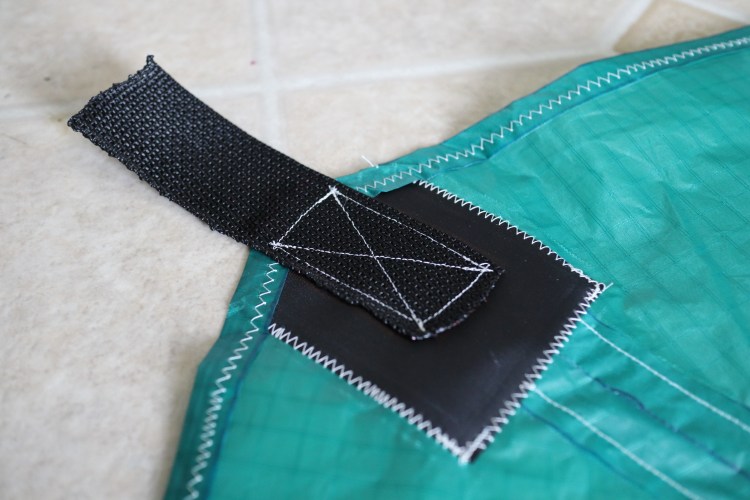
Lower spar pocket made out of webbing 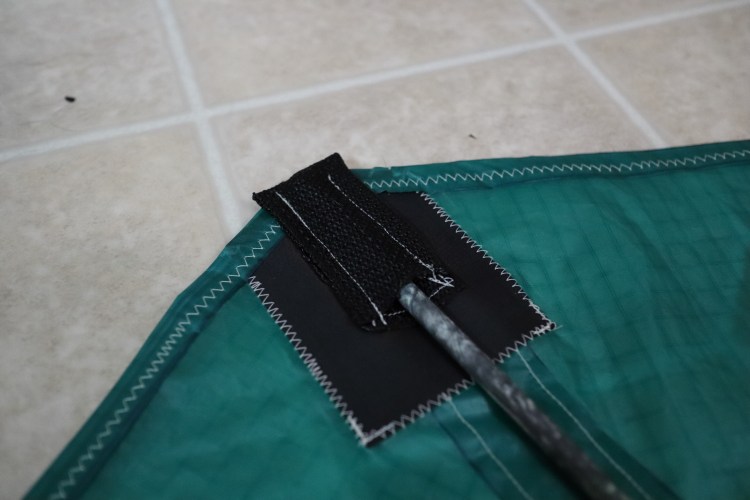
Fold over and sew down along the left and right edges to form the lower pocket 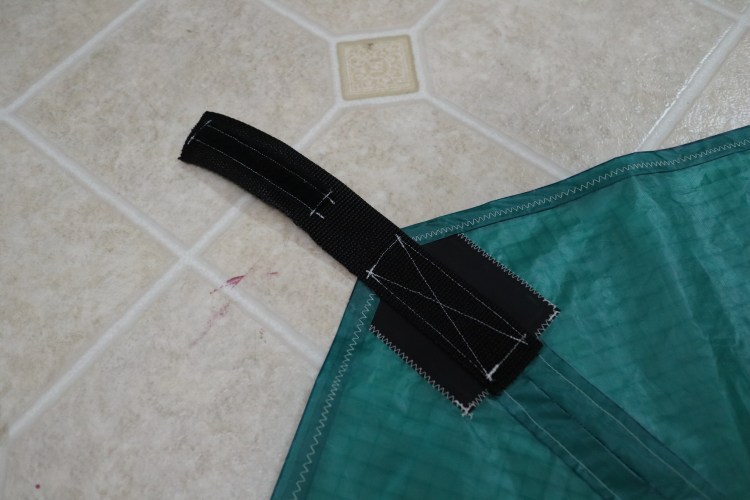
Upper spreader adjustable pocket piece 1 with velcro 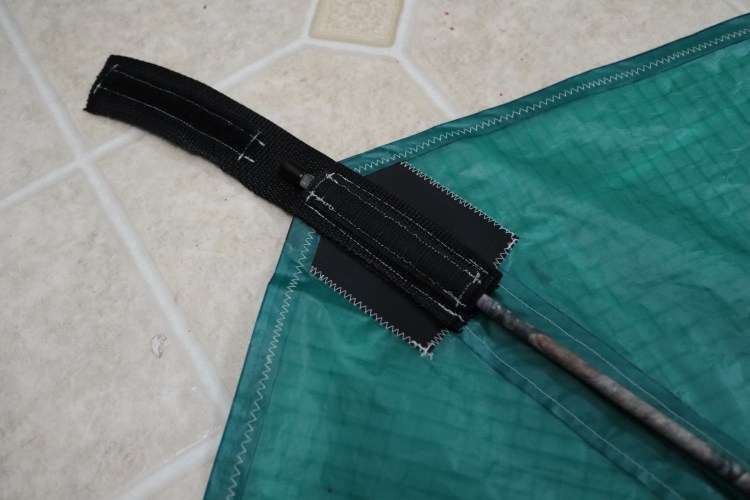
Form a sleeve by sewing on another piece length of webbing, also with velcro 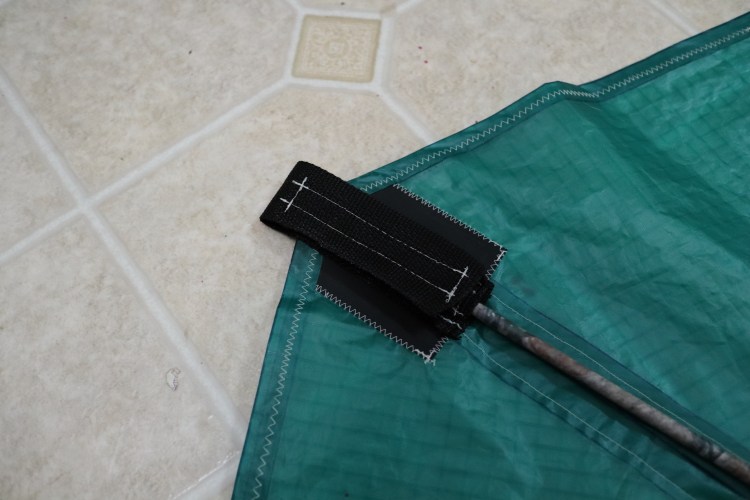
Completed adjustable spar pocket (upper) 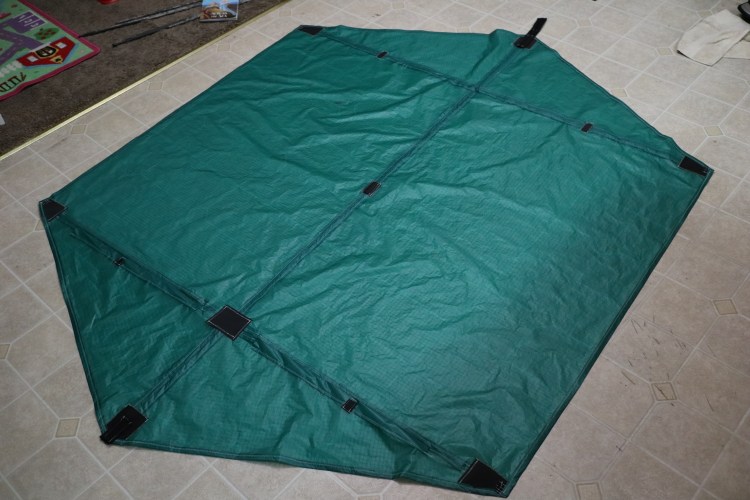
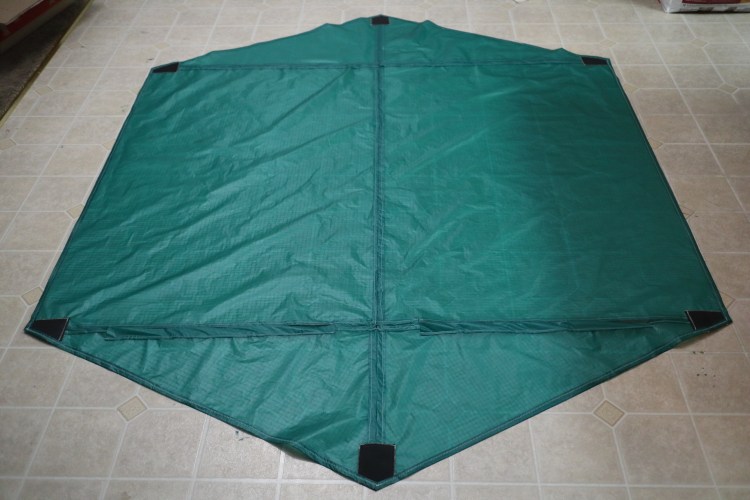
Completed sail
Now we get to make the attachments for the spars to the sail. (We’re almost done now — are you getting excited?) There are several ways to accomplish this. For the spreaders, I like to use simple tie-downs, securing them to the sail with simple lengths of string passing through arrow nocks at the ends of the spreaders. To create the tie-downs, cut several thin strips of dacron, fold them over once, and sew down the folds. These are then sewn to the corners of the sail, lifted up in the middle to create a channel for the string. Hopefully the pictures above explain that. A knot at the end of the string will pull up against the folded edge of dacron, preventing it from pulling through.
For the vertical spar, I chose to make pockets out of webbing (similar to the material that backpack straps are made out of, but not as heavy duty). The lower pocket is created by sewing a piece of webbing 15 cm long by 3.7 cm wide onto the bottom corner patch. Then fold it over at the corner and sew down the fold on the long edges only to create the pocket.
The upper pocket needs to be adjustable, for two reasons. One, it would be hard or impossible if to insert the spar if it couldn’t slide through one end, and two, to be able to put some tension in the sail. The adjustable pocket is a little more complicated, but not difficult. Take a 25 cm by 3.7 cm length of webbing and sew a 10 cm length of velcro to it. Sew the webbing onto the top corner patch so that the velcro section hangs off the top of the kite. It should be sewn in such a way that, when folded over, the velcro faces down, touching the sewn-on portion of webbing. Next, take a 10 cm by 3.7 cm length of webbing and sew the opposite 10 cm section of velcro to it (if you used loops for the first piece, use hooks for this one, or vice versa). Sew this section of webbing on top of the first one, along the long edges only, with the velcro facing up, to create a channel. The vertical spar will pass through this channel, and the tension can be adjusted using the velcro, as you can see in the pictures above.
If you made it this far, congratulations! You are now done sewing the sail.
Final construction
Prepare lengths of string about eight inches long to secure the spreaders to the sail. Make a larger stopper knot in one end and pass the string through the tie-downs. To secure the spreaders to the vertical spar, use short lengths of rope passing under the vertical spar and tied on top of the spreaders. Use electrical tape to hold it in place on the vertical spar.

Upper spreader attached to sail with tie-down 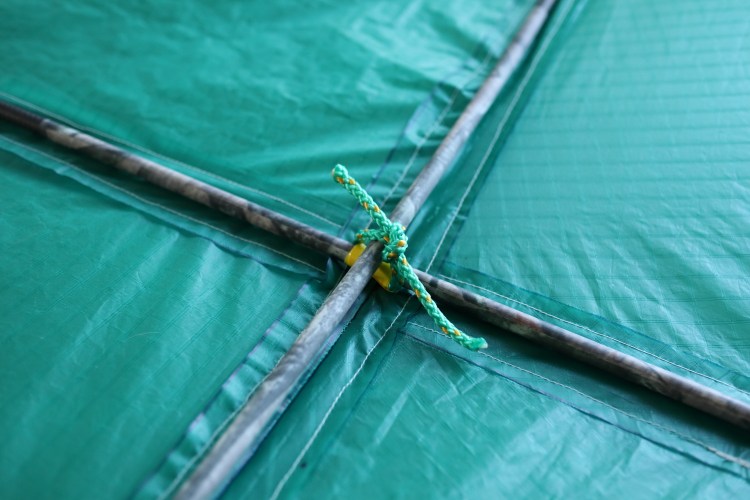
Rope ties at crossings between spreaders and vertical spar. Electrical tape holds the rope in place on the spine. The rope should pass around both spars. 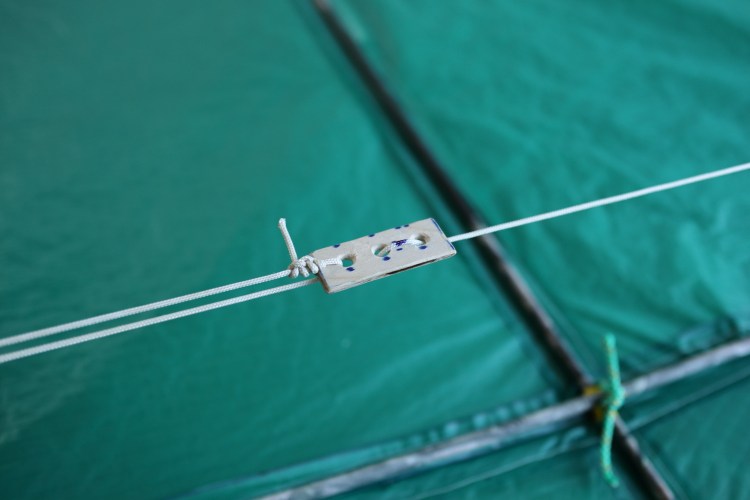
Bow line tensioner made out of 3 mm plywood. Cut, drilled, and sanded smooth. 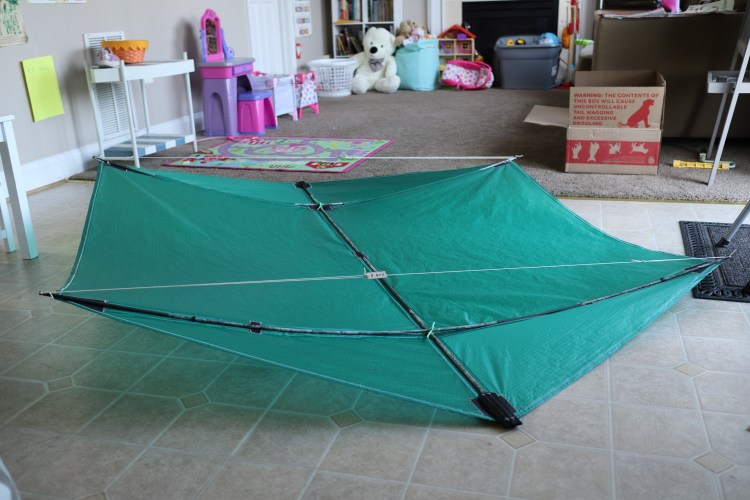
Standard setting is 6 inches of bow for upper spreader and 8 inches for lower spreader 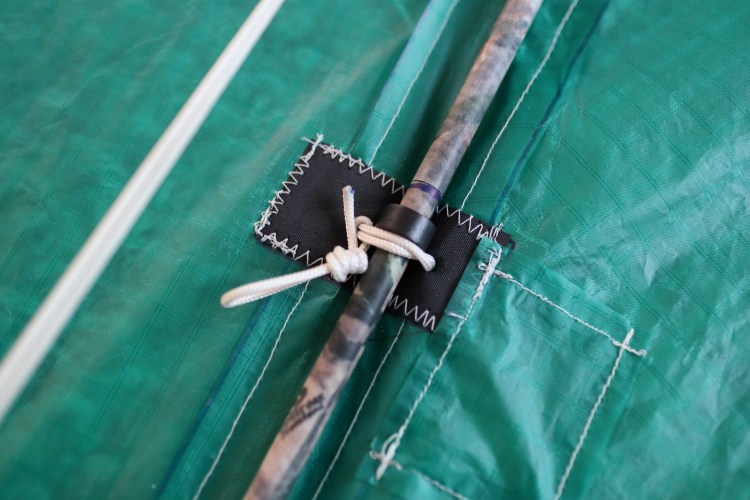
Double-wrap slip knot to secure bridle to upper spreader 
Double-wrap slip knot to secure bridle to lower spreader 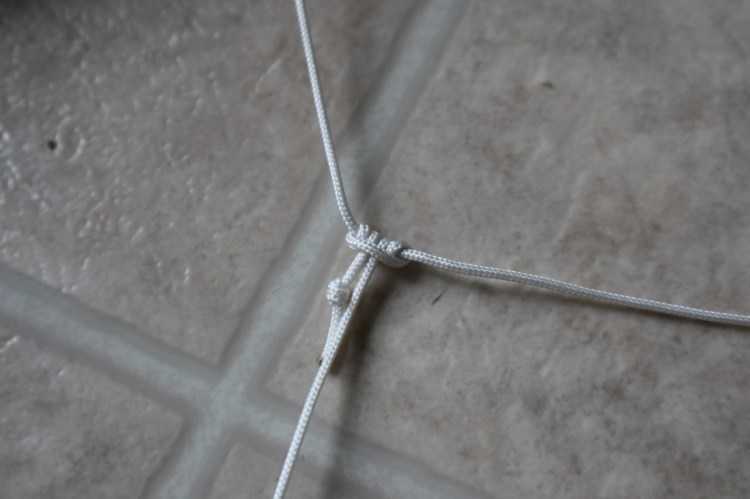
Prusik knot in sliding position 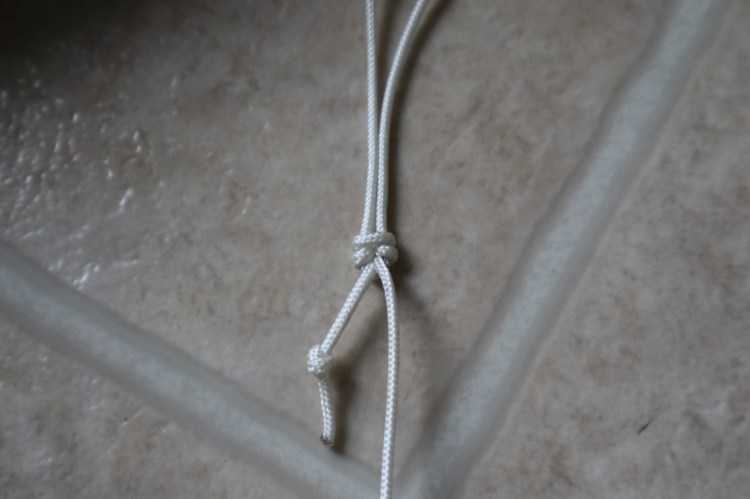
Prusik knot in locked position 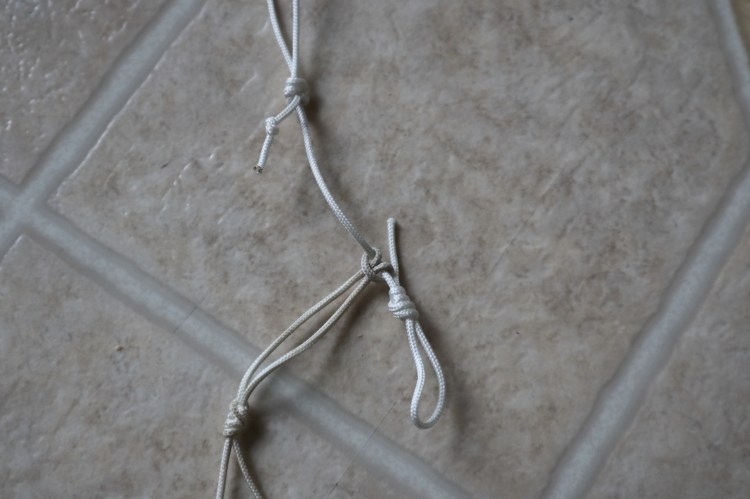
Flying line attached to bridle with a lark’s head knot
For stable flight, it’s important to bow the horizontal spreaders. This is done by attaching some flying line through the arrow nocks on both ends and then pulling tension into the line. Take a length of flying line about 1.5 times the length of the spreader (about 100 inches) and tie a large loop knot in one end. Then feed the other end of the line through two holes of a tensioner. The tensioner can be made from some 3 mm plywood with three holes drilled in it and sanded smooth (see the close-up picture in the slideshow above for details), or you can buy them from various kite shops. Then wrap the line through the nock on the other end of the spreader, and finally tie it off on the tensioner again. As the name implies, the tensioner pulls the line in tension, or releases the tension, when you slide it back and forth along the line. Once tension is applied, friction keeps it in place. Pull the tensioner for the top spreader until you measure six inches of bow from the middle of the spreader to the bow line and make a mark on the line for future reference. Use eight inches for the lower spreader. These can be adjusted a little bit based on the wind conditions: more bow for stronger wind, and less bow for lighter wind, but it’s best to have more bow in the bottom than the top.
The final step is the bridle. Cut two lengths of flying line 126 inches long. These will form the upper and lower bridle legs attached to the spreaders. Make some small holes in the patches on the sail that you made earlier, just big enough for a few widths of flying line to pass through. To keep the holes from fraying, light a match, then blow it out and use the end to apply some heat around the holes. (Make sure you don’t let the flame get close to the sail while it is lit. It will melt a hole! Don’t ask me how I know. 😉 The patch I needed to make to fix that mistake is visible in one of the pictures above.) The bridle will be secured to the spreaders using double-wrap slip knots and some C-clips, as shown in the pictures above. You will need a small loop knot in each end of the line, but before doing that, feed it through the holes you made in the sail a few times as needed to do the double-wrap part of the slip knot. Once that’s done, you can tie the loop knots and pull them tight against the spreaders. If you want to remove the spreaders for transport later, you can just loosen up the knots again.
Next, we need to make a vertical bridle line connecting the two horizontal lines. Use a single 84 inch length of flying line, and attach it to the two horizontal legs using Prusik knots. Attach them as close to the centers of the horizontal legs as you can. The Prusik knots can be slid left and right later if needed to trim the kite. I normally make a small knot in the end of the excess string at the end of the Prusik knot, because otherwise it may slide out after repeated use.
Finally, take a 12 inch length of flying line and tie a double loop knot in one end. Attach it to the vertical bridle leg using another Prusik knot at the other end. To start, position it at the center of the vertical bridle leg, and then slide it eight inches towards the top of the kite. The position of this final piece of the bridle sets the tow point, which controls the angle of attack of the kite. Sliding it towards the top will reduce the angle of attack, and sliding it towards the bottom will increase the angle of attack. Use a low angle of attack for stronger winds and a higher angle for lighter winds. However, be careful not to move it too far in either direction. Too far towards the top will result in an unstable kite, while too far towards the bottom will result in too much drag, and the kite may fly at a very low line angle or not lift off at all. Only small adjustments are normally needed. The flying line is attached to the bridle using a lark’s head knot, as shown in the last picture above.
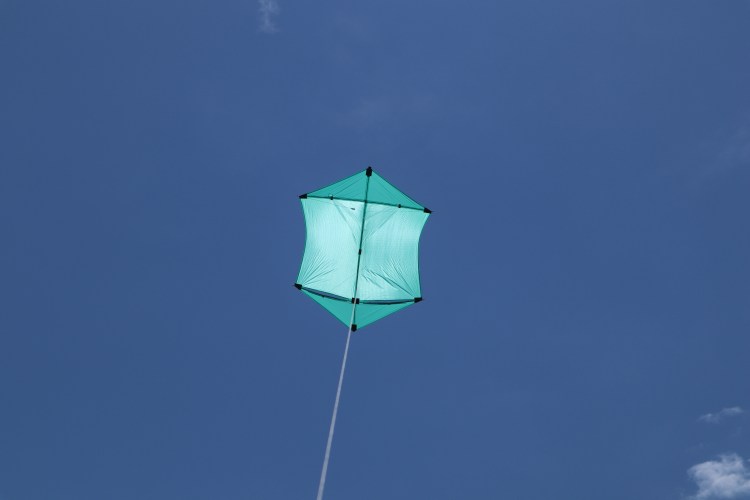
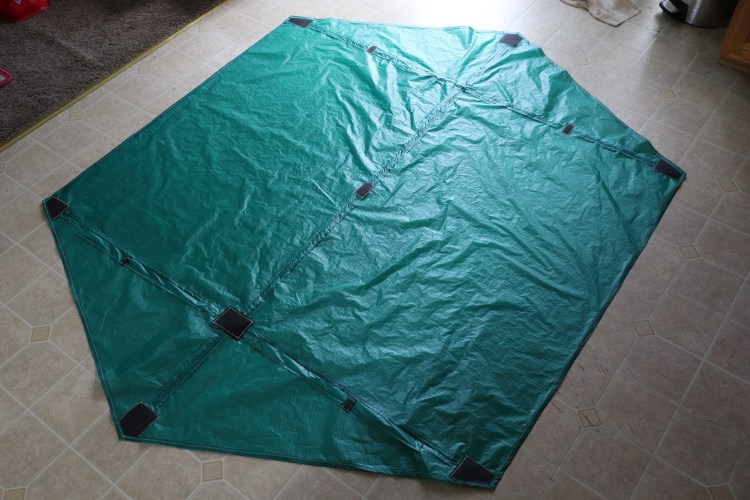
When you’re all done, the kite should look something like this:

Flying
Flying this kite is really not much different from the Mini Dopero, other than the different wind speed range, so go take a look at the flying tips on that page. As with any big kite, be sure to wear protective gloves whenever you’re handling the line, and be careful not to fly anywhere that could cause hazards if something goes wrong (like near power lines, highways, or airports). Most importantly, have fun and happy KAPing! If you decide to make this kite, I’d love to hear about it!
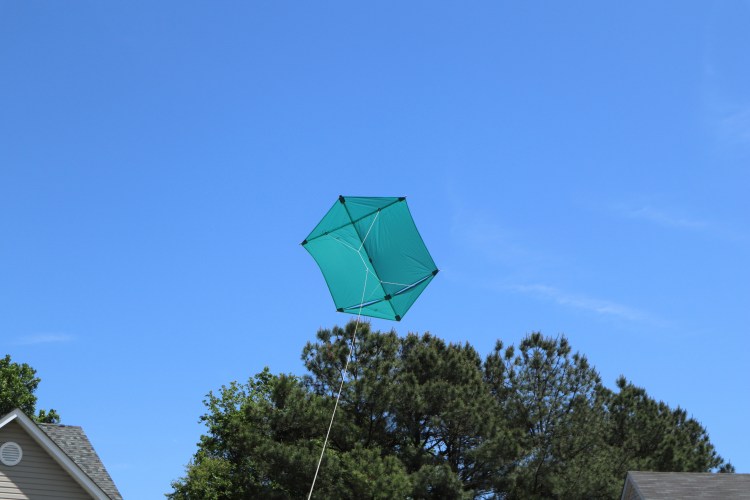
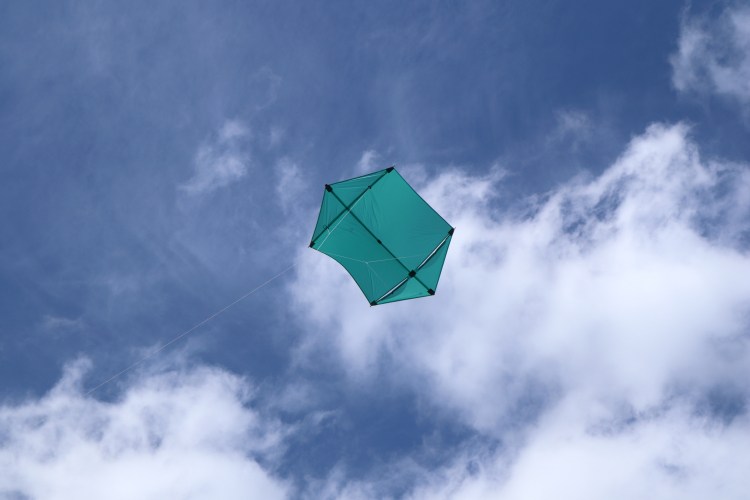
Enjoy some pictures and a video of the Rokker lifting a camera below: