It was inevitable — I got bitten by the R/C bug. The idea of being able to control where the camera is pointing, take a picture when desired, and see it all from the ground with a video downlink was too good not to try it. Plus, since I already had a lot of radio control equipment, it wouldn’t cost me that much to do it. After taking some measurements, I fired up FreeCAD, an excellent open-source CAD program that I’d used before to design model airplanes. Within a couple hours of work, the design was ready to go.
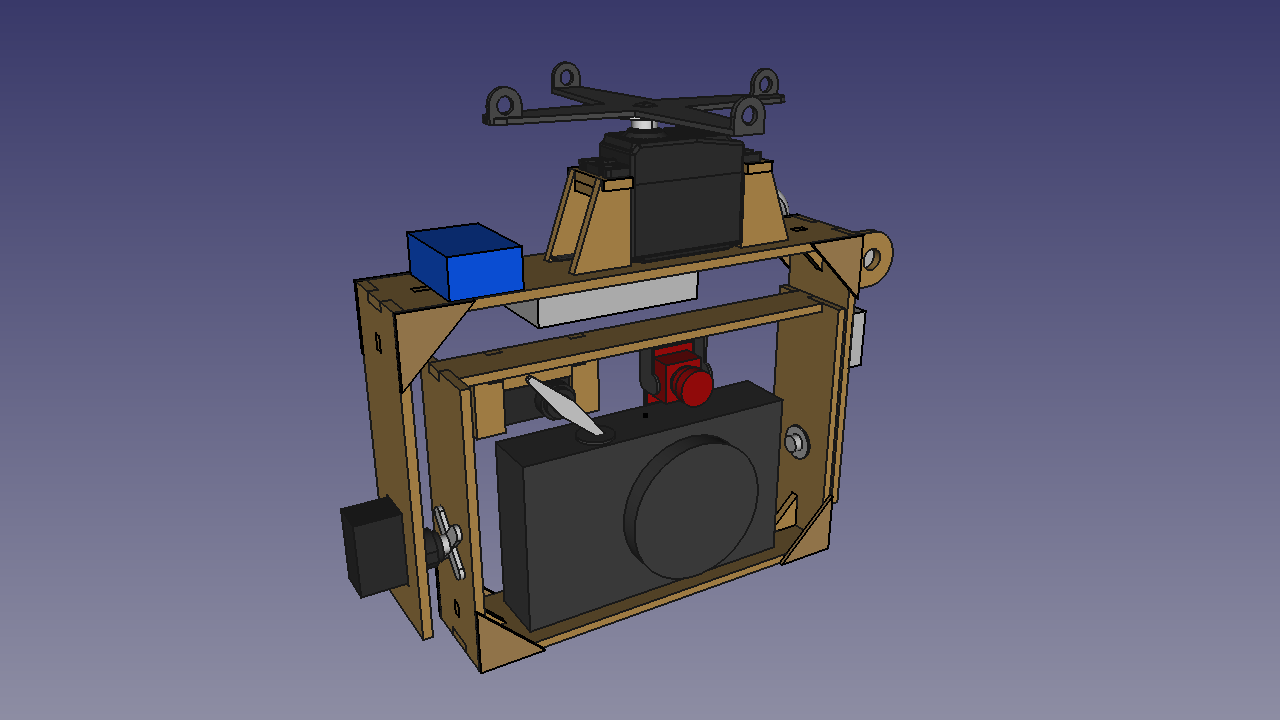
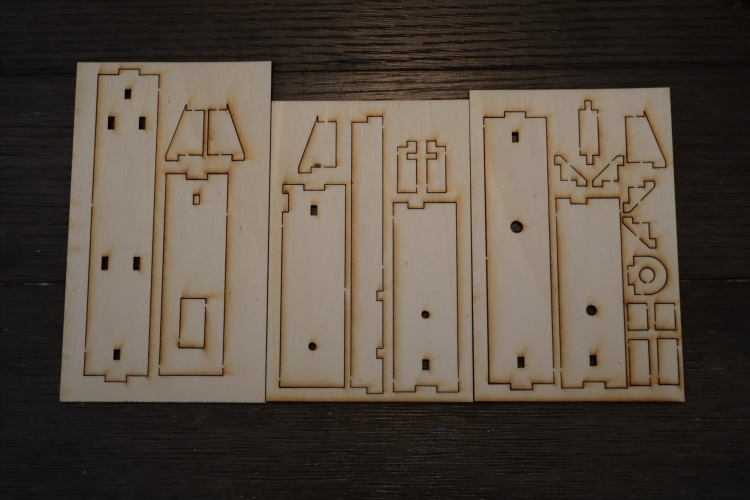
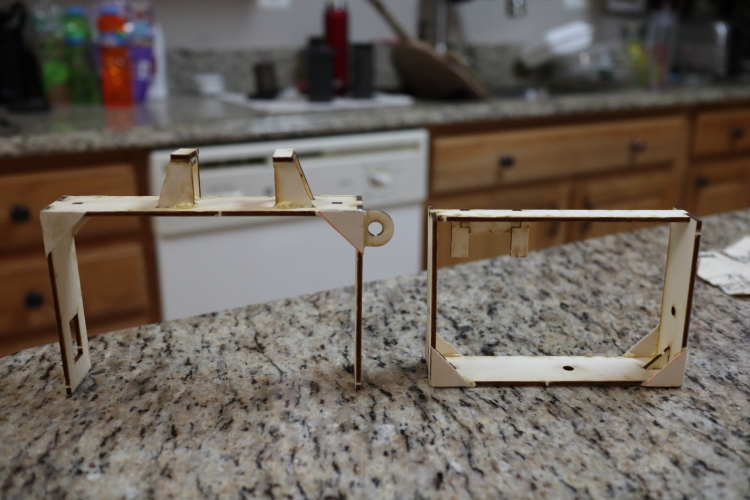
Like my other rigs, the frame is made of 3 mm plywood, and it’s designed around the Canon Powershot S100. This time, though, I didn’t cut the parts out by hand with a Dremel; I sent them away to a laser-cutting service. (Manzano Laser Works, if you’re interested. They do a good job and have reasonable prices. I’ve used them before for R/C airplane designs too.) That allowed me to put notches and tabs in the wood for easier and stronger construction, and, of course, spared me the work of cutting out the pieces. I was able to estimate the total weight and center of mass with a FreeCAD macro to make sure it wasn’t going to be too heavy and would balance along the pan axis. The entire cost of laser cutting — including the wood and shipping — was only $17. Definitely worth it! The pictures below show how the wood looked when it arrived and then after being glued together.
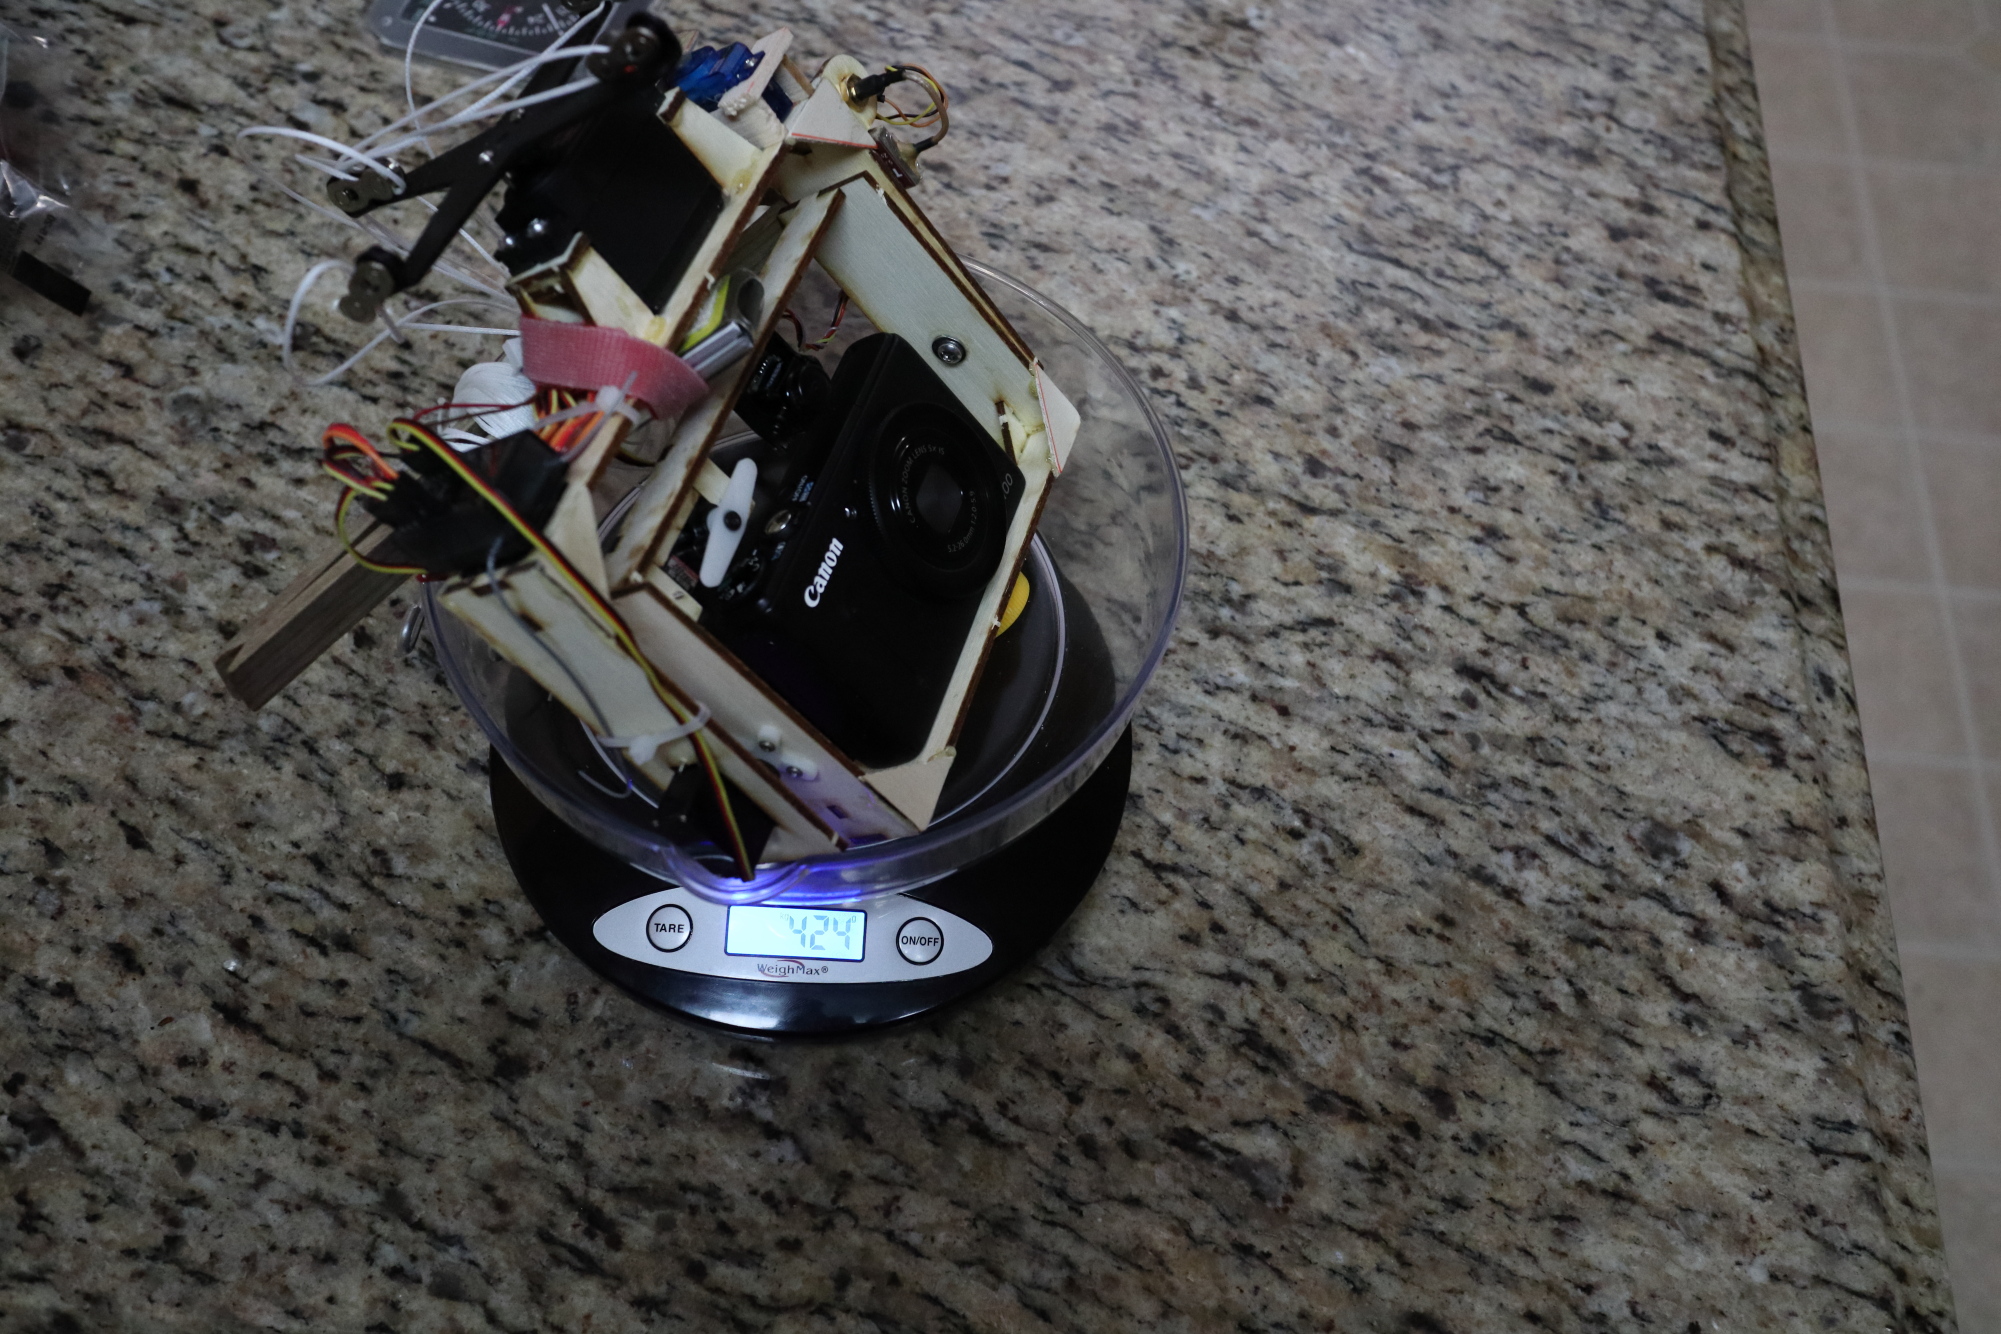
The total weight of everything when assembled came out to 15 oz / 424 grams. Not too bad for a pitch + pan + shutter + video downlink rig, I’d say. (There’s a picture below if you need proof. 🙂 )
Here is a list of all the electronic components on the rig:
- Standard-size continuous rotation servo from Brooxes KAP shop (pan control)
- 2x Hitec HS-65HB feather servos (tilt and shutter control)
- Hitec HS-50 micro servo (video downlink on/off)
- Spektrum AR610X 2.4 GHz receiver
- 2S 500 mah lithium polymer battery
- ImmersionRC Tramp HV 5.8 GHz video transmitter (for video downlink – 25 mW setting works fine)
- TrueRC 5.8 GHz antenna (for video downlink)
- Foxeer Monster Micro FPV camera with RunCam 2.1 mm lens (I had to grind it down a bit and remove the back element to get it to focus properly, but it works and gives a bit less wide-angle view than the stock 1.8 mm lens, which is what I was trying for)
To control the rig from the ground, I use a Spektrum DX6i transmitter. To see the video downlink, I use an FXT FX508 5″ FPV monitor mounted on top of the transmitter with a homemade plywood mount, as you see in the video at the top of this page. Here is a video showing the video downlink on a particularly gusty day. (Note that this video isn’t supposed to be good, just sufficient for composing a picture. Hence the low resolution and lack of stabilization.)
Unfortunately, I only got to use this rig one time before it met an untimely demise in Breton Bay. For now, I’ve switched back to an AutoKAP rig, but I may build another one like this at some point in the future.
