Usually, when doing kite aerial photography, the camera is attached to a rig suspended from the line. Usually, the rig is designed to have some sort of passive stabilization, but rigs designed for video may use gimbals or digital image stabilization as well. Some common types of rigs include:
- Picavet: a cross-shaped top piece with four rings or bearings. String is threaded through the rings or bearings in a particular way that allows it to slide back and forth as the kite moves around, with the weight of the rig working to keep it level. The camera is normally attached to a frame below the cross. The frame can be fixed or able to rotate about one or two axes, either automatically (“AutoKAP”) or manually via remote control.
- Pendulum: another way to stabilize the rig, simpler than a picavet, but typically heavier.
- Hanging from a string: some people use a light camera like a GoPro, suspended from the kite line with a simple string, when there is not enough wind to lift anything heavier.
My AutoKAP Rig
My current rig is the one in the video at the top of the page. It is designed around the Sony RX0 camera, which is an excellent camera for stills with a 1-inch-type sensor and a sharp, fixed focal length, 24 mm equivalent Zeiss lens. In addition to the excellent sensor and lens, this camera is great for KAP because it is tiny at only 3.9 oz (110 g), waterproof, and shockproof. The one downside is that it does not have a built-in intervalometer or infrared trigger, so you need a servo to operate the shutter in the air. The Mark II version of this camera does have an intervalometer and improved video capabilities, including stabilization, so that would make an even better choice, especially for people who want to do Kite Aerial Videography, but it is also more expensive.
The frame for this rig is made out of 1/8 inch (3 mm) plywood pieces, cut with a dremel and a drill. Each of the main pieces of the frame is 1 3/8 inches wide, and they are glued together with Gorilla Glue. The picavet cross comes from Brooxes KAP shop. The total weight of the rig is 10.8 oz (305 g), including the camera and everything else.
Electronics include a 2-cell 360 mah lithium polymer battery, which powers the servos and the controller. The battery only weighs 0.75 oz (22 g) but provides 6.5 – 8.4 volts, depending on the charge state, and enough capacity for several sessions in between charges. Attached to the cross is a Hitec HSR-1425CR continuous rotation servo, which rotates the rig. The shutter is actuated by Hitec HS-65HB sub-micro servo. (The video shows an HS-55, but those feather class servos seem to not be suited for the task, since two of them died during testing.) The servo controller is the Pololu Micro Maestro, which I programmed to rotate 16 degrees and take a picture every 5 seconds, for up to 400 pictures total, with a 5-minute delay at the beginning. Programming the controller is easy. If you are interested in doing that yourself, here is a video to get you started:
My Older Rigs
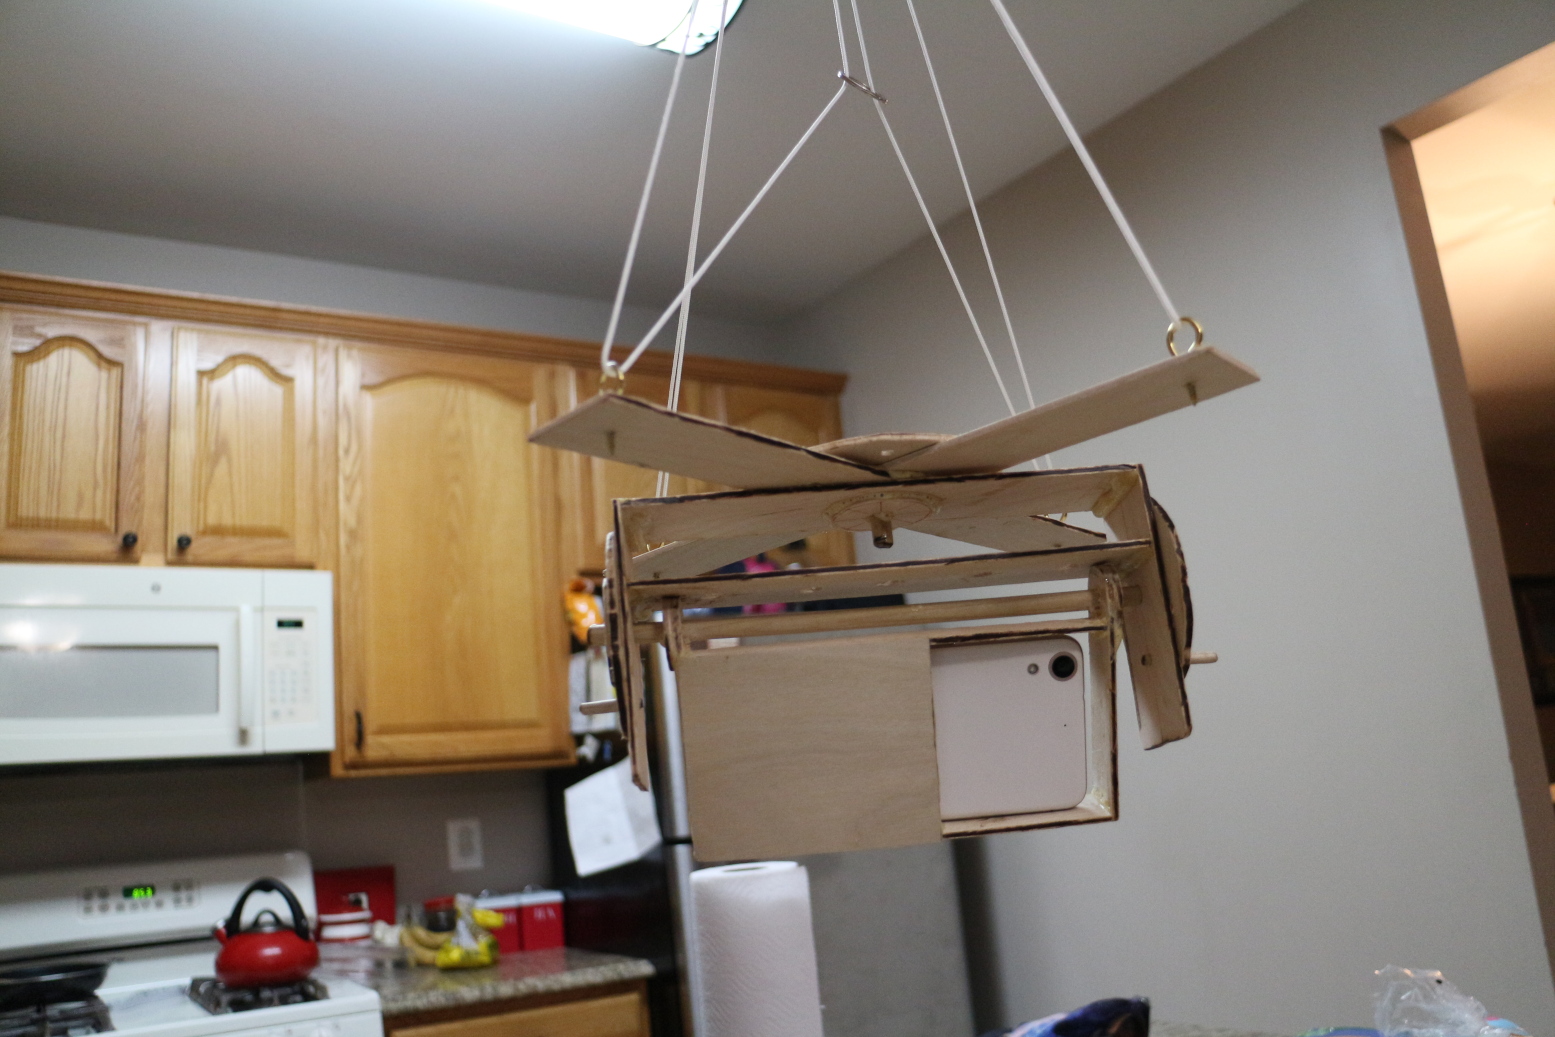
The first rig I made is shown on the right. It was also made out of 1/8 inch plywood. I designed it to carry an old Android phone equipped with an app called Open Camera, which has an intervalometer function. I was quite happy with the results I got with this setup, considering it was my first attempt, though the rig was definitely over-designed (the whole thing came out to about 14 oz), and the app didn’t have a way to set the shutter speed. If you want to see some results that I got with it, take a look at my first ever blog post on this site.
Due to the limitations of the smartphone camera, I pretty quickly “graduated” to a Canon PowerShot, specifically, the SD1400 IS model, using CHDK to control exposure and for the intervalometer. I also made a new rig, shaving off a few ounces compared to the first one.
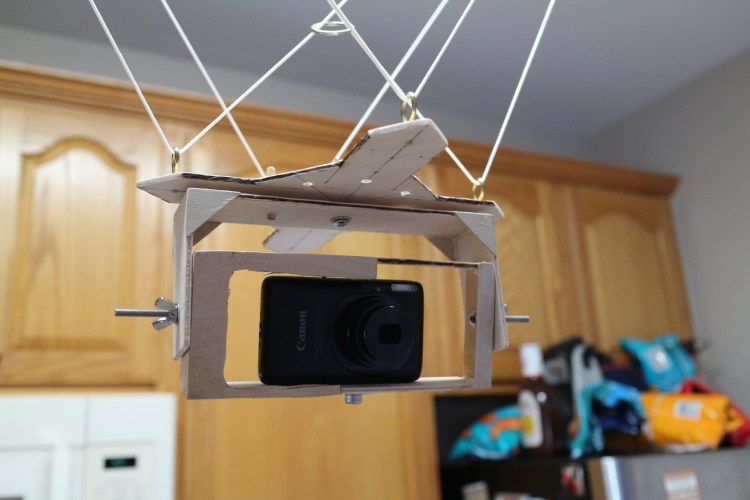
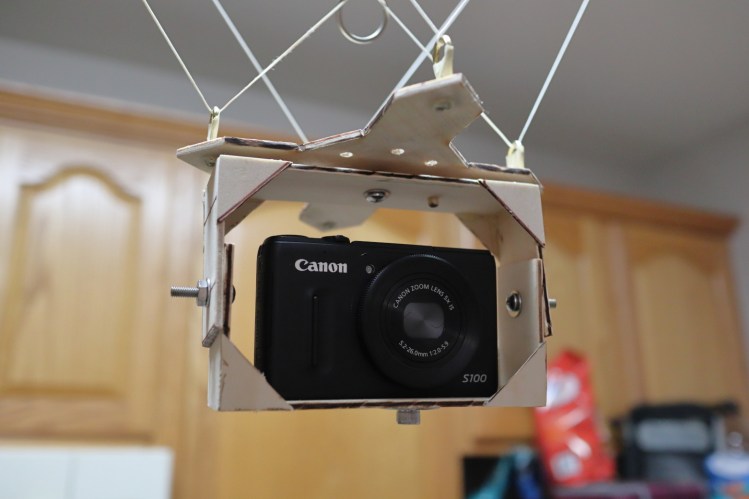
A few months later, I made some more improvements, reducing the weight of the frame and upgrading to the PowerShot S100, which is an excellent KAP camera that can be found used for fairly cheap. The left rig weighed in at 10.4 oz (295 g) with the camera, while the right one weighed in at 10.8 oz (305 g) with the S100 — not too bad considering the S100 itself weighs two or three ounces more than the SD1400 IS. Both of these PowerShots can be run with CHDK as an intervalometer and even to control exposure. For the SD1400 IS, I used the excellent KAP UAV CHDK script for both functions, since this camera doesn’t come with a way to manually set the shutter speed. For the S100, I used a simpler intervalometer script and set the shutter speed to 1/1250 sec with the camera’s shutter speed priority mode.
Rigs You Can Buy
As you may have figured out, I like to build my own kites and rigs (I stop short at making my own cameras 🙂 ), but there is a list of websites on the Resources page that sell KAP rigs, if you prefer to do that.
